| 1F |
|---|

|
성 우르술라 의과대학 병원: 두 판 사이의 차이
kiseki
다른 명령
잔글 문자열 찾아 바꾸기 - "(Zeit)(?!([\S\s](?!<gallery>))*<\/gallery>)(?!.+\.(png)|(jpg)|(jpeg)|(PNG)|(JPG)|(JPEG))" 문자열을 "차이트" 문자열로 |
잔글 Knergy님이 St. Ursula Medical College 문서를 성 우르술라 의과대학 병원 문서로 이동했습니다: Localize title to glossary Korean |
||
| (같은 사용자의 중간 판 하나는 보이지 않습니다) | |||
| 10번째 줄: | 10번째 줄: | ||
|southloc = | |southloc = | ||
}} | }} | ||
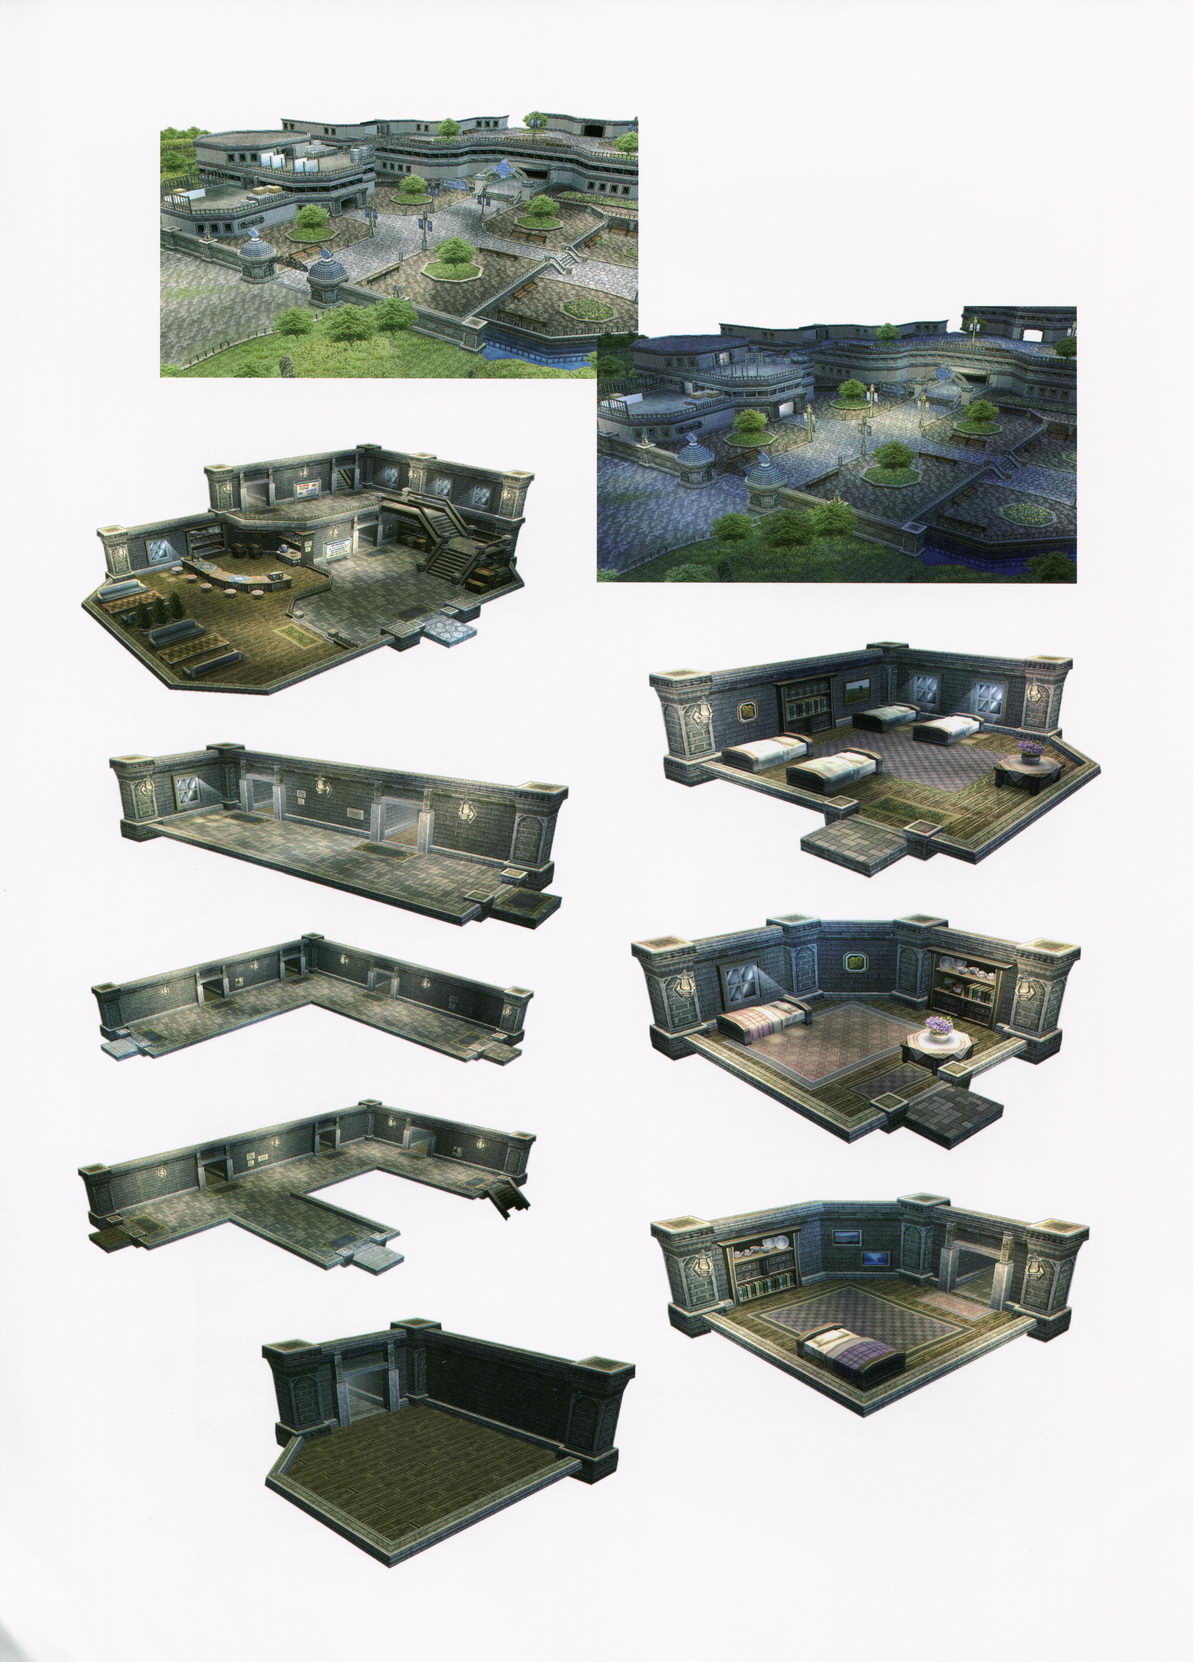
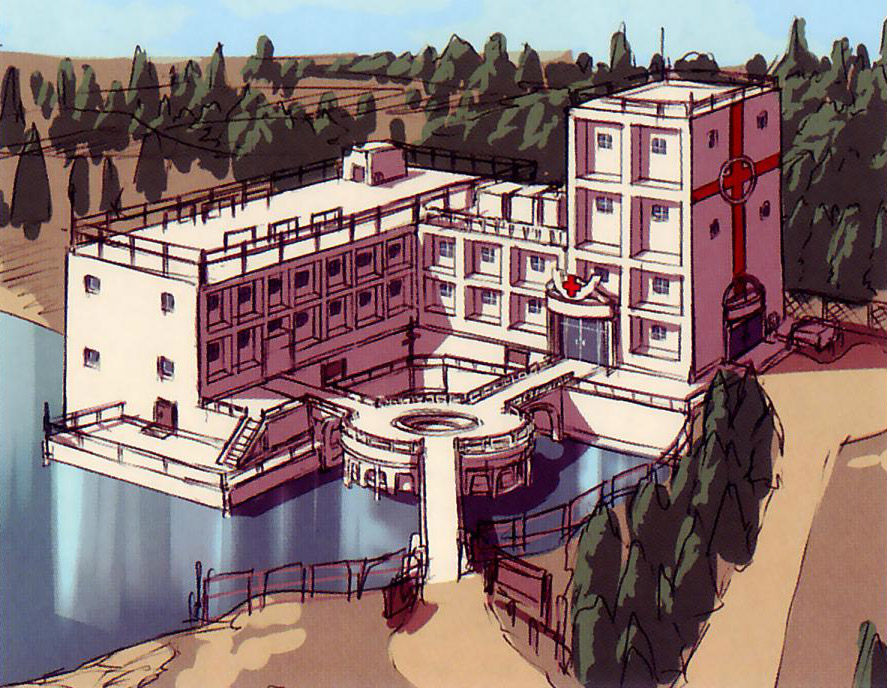
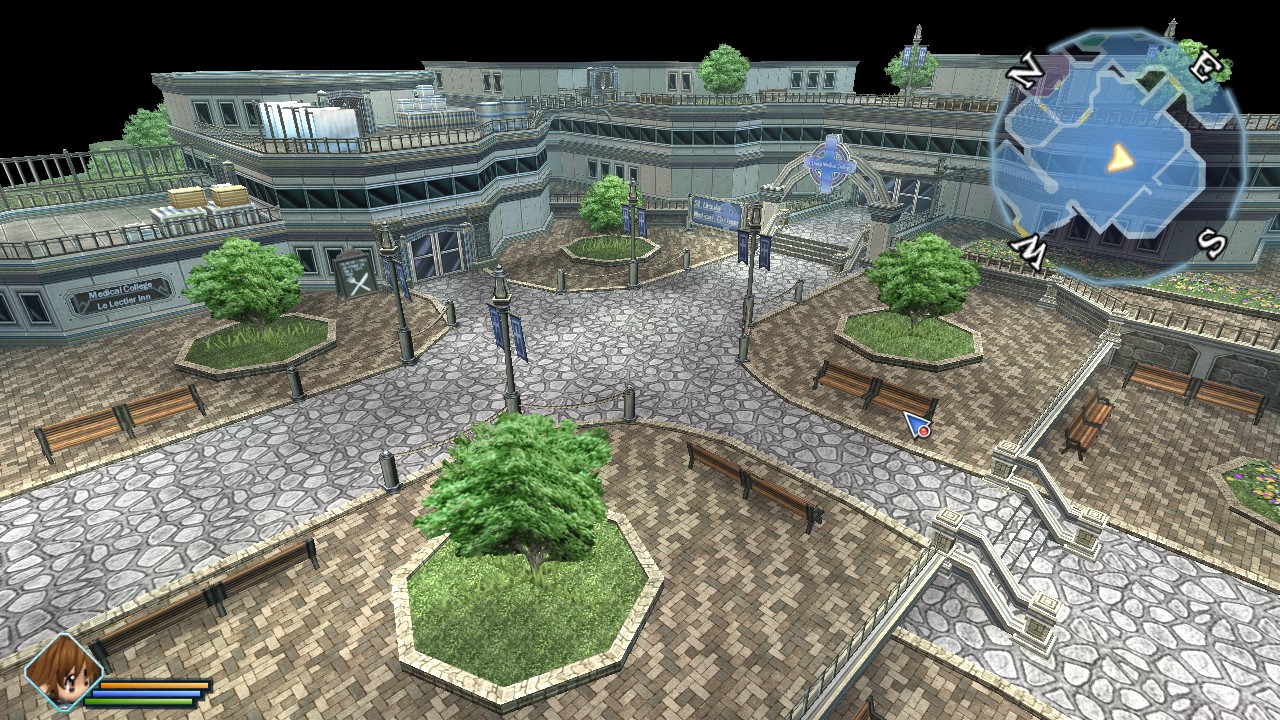
'''St. Ursula Medical College''' ({{furi|聖|せい}}ウルスラ{{furi|医科大学病院|いかだいがくびょういん}}) is a health care research institute situated near Lake Elm in southern [[Crossbell]]. From [[Crossbell City]], St. Ursula Medical College is 30 minutes by orbal bus (153 [[Metric system|selge]]).[[File:St. Ursula Medical College Cross | '''St. Ursula Medical College''' ({{furi|聖|せい}}ウルスラ{{furi|医科大学病院|いかだいがくびょういん}}) is a health care research institute situated near Lake Elm in southern [[Crossbell]]. From [[Crossbell City]], St. Ursula Medical College is 30 minutes by orbal bus (153 [[Metric system|selge]]).[[File:St. Ursula Medical College Cross|thumb|Emblem]] | ||
__TOC__ | __TOC__ | ||
=== Map === | === Map === | ||
| 26번째 줄: | 26번째 줄: | ||
== {{g|Zero}} == | == {{g|Zero}} == | ||
=== Background === | === Background === | ||
The [[Special Support Section]] first travels to St. Ursula to investigate monster attacks on behalf of the [[Crossbell Guardian Force]]. After helping save the bus from jungle monsters with the assistance of [[ | The [[Special Support Section]] first travels to St. Ursula to investigate monster attacks on behalf of the [[Crossbell Guardian Force]]. After helping save the bus from jungle monsters with the assistance of [[Estelle Bright|Estelle]] and [[Joshua Bright|Joshua]], they arrive at the hospital where [[Lloyd Bannings|Lloyd]] reunites with [[Cecile Neues]], his late brother's fiancée. | ||
Cecile takes them to Lytton, the victim of the monster attack who tells them and Doctor [[ | Cecile takes them to Lytton, the victim of the monster attack who tells them and Doctor [[Joachim Guenter]] his story, and to the roof where the attack happened. The SSS investigate the area and determine the point of entry of the monsters to be the lower balcony of the inn. Then they meet [[Shizuku MacLaine]], an inpatient of the hospital and daughter of [[Arios MacLaine|Arios]], who inadvertently gives Lloyd the key to the case when she tells them she heard a faint whistle on the night of the attack, which ended up being [[Revache]]'s method of controlling the war hounds that attacked the intern. | ||
During the Crossbell Anniversary Festival, the hospital receptionist requests the SSS to find Doctor Guenter, who's gone missing to fish at the [[Ursula Road]] sandbar with other [[Fisherman's Guild]] members. After a fishing duel with Lloyd, they return to the hospital. | During the Crossbell Anniversary Festival, the hospital receptionist requests the SSS to find Doctor Guenter, who's gone missing to fish at the [[Ursula Road]] sandbar with other [[Fisherman's Guild]] members. After a fishing duel with Lloyd, they return to the hospital. | ||
After the Festival ends, the SSS take [[ | After the Festival ends, the SSS take [[KeA Bannings|KeA]] to the hospital on the recommendation of Sister Marble to search for a solution to her missing memories, meeting with Doctor Guenter again, who is the head of the Neurology and Pharmacology Department. The doctor asks KeA to stay for a few days to perform some tests, but she refuses and runs away, ending up lost and meeting Shizuku at the rest area. Lloyd finds the two having become friends, with Arios arriving to visit her daughter, asking the SSS to have KeA visit frequently for sake, and they decide to not have KeA stay and look for her relatives by themselves for a while longer. | ||
{{SpoilerSection|Zero}} | {{SpoilerSection|Zero}} | ||
The SSS meet with Doctor Guenter again to ask him to run analysis on the blue pills they found on Gantz after his incident at Barca Casino with [[ | The SSS meet with Doctor Guenter again to ask him to run analysis on the blue pills they found on Gantz after his incident at Barca Casino with [[Lechter Arundel]] which resulted in the former falling unconscious. The doctor tells them of a [[D∴G cult|cult]] that delevoped a drug called [[Gnosis]] with similar effects to those they saw on Gantz. | ||
After Revache, Gantz, and other people go missing, and the SSS with [[ | After Revache, Gantz, and other people go missing, and the SSS with [[Alex Dudley]] investigate Revache's headquarters for clues, discovering them to be the distributors of Gnosis, they decide to meet Guenter in person after he fails to call at the agreed time. Dudley tells them he's found Guenter to be [[Ernest Reis]]' physician, making the doctor the main suspect since Ernest showed the same symptoms as Gantz. | ||
They find the bus heading to the hospital at the side of the road again, empty but with people's belongings inside, and they find the hospital taken over by brainwashed Revache members. With the help of [[Yin]], the SSS liberates the visitors and staff, and enters the Research Ward where Ernest is waiting in Guenter's office to reveal the truth behind the cult and Gnosis, finding [[ | They find the bus heading to the hospital at the side of the road again, empty but with people's belongings inside, and they find the hospital taken over by brainwashed Revache members. With the help of [[Yin]], the SSS liberates the visitors and staff, and enters the Research Ward where Ernest is waiting in Guenter's office to reveal the truth behind the cult and Gnosis, finding [[Tio Plato]] and [[Renne]] as victims of experiments, Speaker [[Hartmann]] as blackmail subject and KeA to be involved in a different way. Renne appears to ask the SSS to deliver a message to the Brights and a warning to them about KeA before leaving. | ||
<span style="font-size:18px;font-weight:500;margin:24px 0 12px">Maps</span> | <span style="font-size:18px;font-weight:500;margin:24px 0 12px">Maps</span> | ||
| 121번째 줄: | 121번째 줄: | ||
<div class="mw-collapsible mw-collapsed" data-expandtext="Show Shops" data-collapsetext="Hide Shops"> | <div class="mw-collapsible mw-collapsed" data-expandtext="Show Shops" data-collapsetext="Hide Shops"> | ||
==== Le Lectier Inn ==== | ==== Le Lectier Inn ==== | ||
{{ | {{#lsth:List of shops (Zero)/Crossbell State|Le Lectier Inn}} | ||
| | |||
</div> | </div> | ||
| 270번째 줄: | 152번째 줄: | ||
== {{g|Ao}} == | == {{g|Ao}} == | ||
=== Background === | === Background === | ||
The new head of Neurology and Pharmacology, [[ | The new head of Neurology and Pharmacology, [[Professor Seiland]], asks the SSS to recover the surveys from a few Gnosis patients before giving them the results of the Gnosis analysis. She also directs [[Shizuku MacLaine]]'s latest operation, which results in a partial success in recovering her eyesight. | ||
{{SpoilerSection|Ao}} | {{SpoilerSection|Ao}} | ||
After KeA's ascension to [[Sept-Terrion]] of Zero, she fully heals Shizuku's eyesight, ending her stay in the hospital. Following Lloyd's escape from prison and his reunion with [[ | After KeA's ascension to [[Sept-Terrion]] of Zero, she fully heals Shizuku's eyesight, ending her stay in the hospital. Following Lloyd's escape from prison and his reunion with [[Wazy Hemisphere|Wazy]] and [[Zeit]], the hospital is the first place they visit to free the rest of the SSS. They defeat the small [[Crossbell Defense Force]] unit stationed and stay hidden from the rest of the force thanks to Wazy's [[Thaumaturgy]], reuniting with Tio, Cecile, [[Ilya Platiere]] and the recovered [[Fran Seeker]]. | ||
<span style="font-size:18px;font-weight:500;margin:24px 0 12px">[[List of enemies (Azure)/St. Ursula Medical College|Enemies]]</span> | <span style="font-size:18px;font-weight:500;margin:24px 0 12px">[[List of enemies (Azure)/St. Ursula Medical College|Enemies]]</span> | ||
| 286번째 줄: | 168번째 줄: | ||
*[[List of quests (Azure)/Chapter 3/Package Pandemonium|Package Pandemonium]]: The second package has to be delivered to the nurses' station. | *[[List of quests (Azure)/Chapter 3/Package Pandemonium|Package Pandemonium]]: The second package has to be delivered to the nurses' station. | ||
*[[List of quests (Azure)/Chapter 4/Delivery Deception|Delivery Deception]]: A criminal steals medical supplies meant for the hospital. | *[[List of quests (Azure)/Chapter 4/Delivery Deception|Delivery Deception]]: A criminal steals medical supplies meant for the hospital. | ||
*<span class="spoiler">[[List of quests (Azure)/Finale/Statewide Assessment|Statewide Assessment]]: Lloyd, Wazy and | *<span class="spoiler">[[List of quests (Azure)/Finale/Statewide Assessment|Statewide Assessment]]: Lloyd, Wazy and Zeit head to the hospital first and reunite with Tio.</span> | ||
=== [[List of shops (Azure)/Crossbell State|Shops]] === | === [[List of shops (Azure)/Crossbell State|Shops]] === | ||
<div class="mw-collapsible mw-collapsed" data-expandtext="Show Shops" data-collapsetext="Hide Shops"> | <div class="mw-collapsible mw-collapsed" data-expandtext="Show Shops" data-collapsetext="Hide Shops"> | ||
==== Le Lectier Inn ==== | ==== Le Lectier Inn ==== | ||
{{ | {{#lsth:List of shops (Azure)/Crossbell State|Le Lectier Inn}} | ||
| | |||
</div> | </div> | ||
| 442번째 줄: | 198번째 줄: | ||
|colspan="2" style="text-align: left"|I can always count on St. Ursula to fill my prescription for fishin'. | |colspan="2" style="text-align: left"|I can always count on St. Ursula to fill my prescription for fishin'. | ||
|} | |} | ||
== {{g|Sen IV}} == | |||
=== Background === | |||
Some time between S.1204 and S.1206, the previous Head Nurse retired and [[Cecile Neues]] became the new Head Nurse. | |||
Emperor [[Eugent Reise Arnor III]] was taken to St. Ursula after being shot during the [[Heimdallr]] Summer Festival. New [[Class VII]] head to the hospital looking for [[Valerie]], but they notice Supreme Commander [[Vandyck]] and Governor General [[Rufus Albarea]] have arrived for a visit as well, hiding in the nurse station with [[Grace Lynn]] and Valerie. Vandyck finds them anyways and speaks with them before leaving the hospital. | |||
Cecile takes them to see the emperor, who has awakened from the coma before [[Professor Seiland]] carries out the surgery he needs. He gives them the information the [[Black Records]] revealed before falling asleep again. Afterwards, they notice Rufus hasn't left with Vandyck, but has gone to the [[Wetlands]], stationing the [[Imperial Defense Force]] and preventing them from searching the area for the final singularity. [[Stark]] provides them with an orbal boat to head to [[Mishelam]] and access the wetlands from the opposite side instead. | |||
=== [[List of quests (Cold_Steel_IV)|Quests]] === | |||
* [[List_of_quests_(Cold_Steel_IV)/Act_1_-_Part_3/Crossbell_Singularity|Crossbell Singularity]]: New Class VII speak with the emperor and travel to Mishelam by boat to bypass the IDF. | |||
=== [[List of shops (Cold Steel IV)/Crossbell|Shops]] === | |||
<div class="mw-collapsible mw-collapsed" data-expandtext="Show Shops" data-collapsetext="Hide Shops"> | |||
==== Le Lectier Inn ==== | |||
{{#lsth:List of shops (Cold Steel IV)/Crossbell|Le Lectier Inn}} | |||
</div> | |||
=== [[List of fishing spots (Cold Steel IV)#Crossbell|Fishing]] === | |||
{| class="article-table" style="text-align: center" width=100% | |||
!style="width: 1%"|Location | |||
!colspan="4"|Fish | |||
|- | |||
|[[File:Fishing Spot - St. Ursula Medical College (Sen IV).jpg|frameless|x180px]]<br>'''St. Ursula Medical College''' | |||
|colspan="4"|'''Flamear Ojo''' <ref group="note">Only after speaking with Kenneth from 8/30 onwards.</ref> | |||
|}<references group="note"/> | |||
== Organisation == | == Organisation == | ||
=== Hospital === | === Hospital === | ||
* '''[[ | * '''[[Professor Seiland]]''' | ||
* Doctor Lago Nixon | * Doctor Lago Nixon | ||
* Doctor Gailey Reutzel | * Doctor Gailey Reutzel | ||
* Doctor [[ | * Doctor [[Joachim Guenter]] | ||
* Chief Ursuline | * Chief Ursuline | ||
* Doctor Belldine | * Doctor Belldine | ||
| 459번째 줄: | 241번째 줄: | ||
* Flora | * Flora | ||
* Michaud | * Michaud | ||
* Luc | |||
=== Nurses === | === Nurses === | ||
* Head Nurse Martha | * Head Nurse Martha | ||
* [[ | * [[Cecile Neues]] | ||
* Lan | * Lan | ||
* Cirone | * Cirone | ||
| 468번째 줄: | 251번째 줄: | ||
* Meifa | * Meifa | ||
* Ada | * Ada | ||
* Jenny | |||
=== Patients === | === Patients === | ||
* [[ | * [[Shizuku MacLaine]] | ||
* Michael | * Michael | ||
* Old Lady Yaila | |||
* Nena | |||
* Marty | |||
* Vanson | |||
=== Others === | === Others === | ||
* | * Chief Clark | ||
* Receptionist Sera | * Receptionist Sera | ||
* Superintendent Kirsch (Le Lectier Inn/Buffet & Inn - Lectier) | * Superintendent Kirsch (Le Lectier Inn/Buffet & Inn - Lectier) | ||
| 480번째 줄: | 268번째 줄: | ||
* Janitor Dyson | * Janitor Dyson | ||
* Security Guard Tony | * Security Guard Tony | ||
* Lieri | |||
* Old Man Ordo (Obitt in {{g|Hajimari}}) | |||
=== Departments === | === Departments === | ||
* Neurology Department (previously managed by Dr. | * Neurology Department (previously managed by Dr. Joachim Guenter; currently managed by Professor Seiland) | ||
* Pharmacology Department (previously managed by Dr. | * Pharmacology Department (previously managed by Dr. Joachim Guenter; currently managed by Professor Seiland) | ||
* Surgical Department (managed by Dr. Gailey Reutzel) | * Surgical Department (managed by Dr. Gailey Reutzel) | ||
* Internal Medicine Department (managed by Dr. Lago Nixon) | * Internal Medicine Department (managed by Dr. Lago Nixon) | ||
2026년 7월 29일 (수) 23:53 기준 최신판
St. Ursula Medical College (
Map
| St. Ursula Medical College |
|---|

|
Background
- Main article: St. Ursula
St. Ursula is named after the daughter of a therapist who lived during the Middle Ages known for remonstrating with a ruling lord. After that, even the Septian Church canonised her a saint. It is commonly believed that she died young, while she actually survived and married a knight, the two of them remaining in Crossbell for the rest of her life. The novel The Saint and the White Wolf is based on St. Ursula's legend.
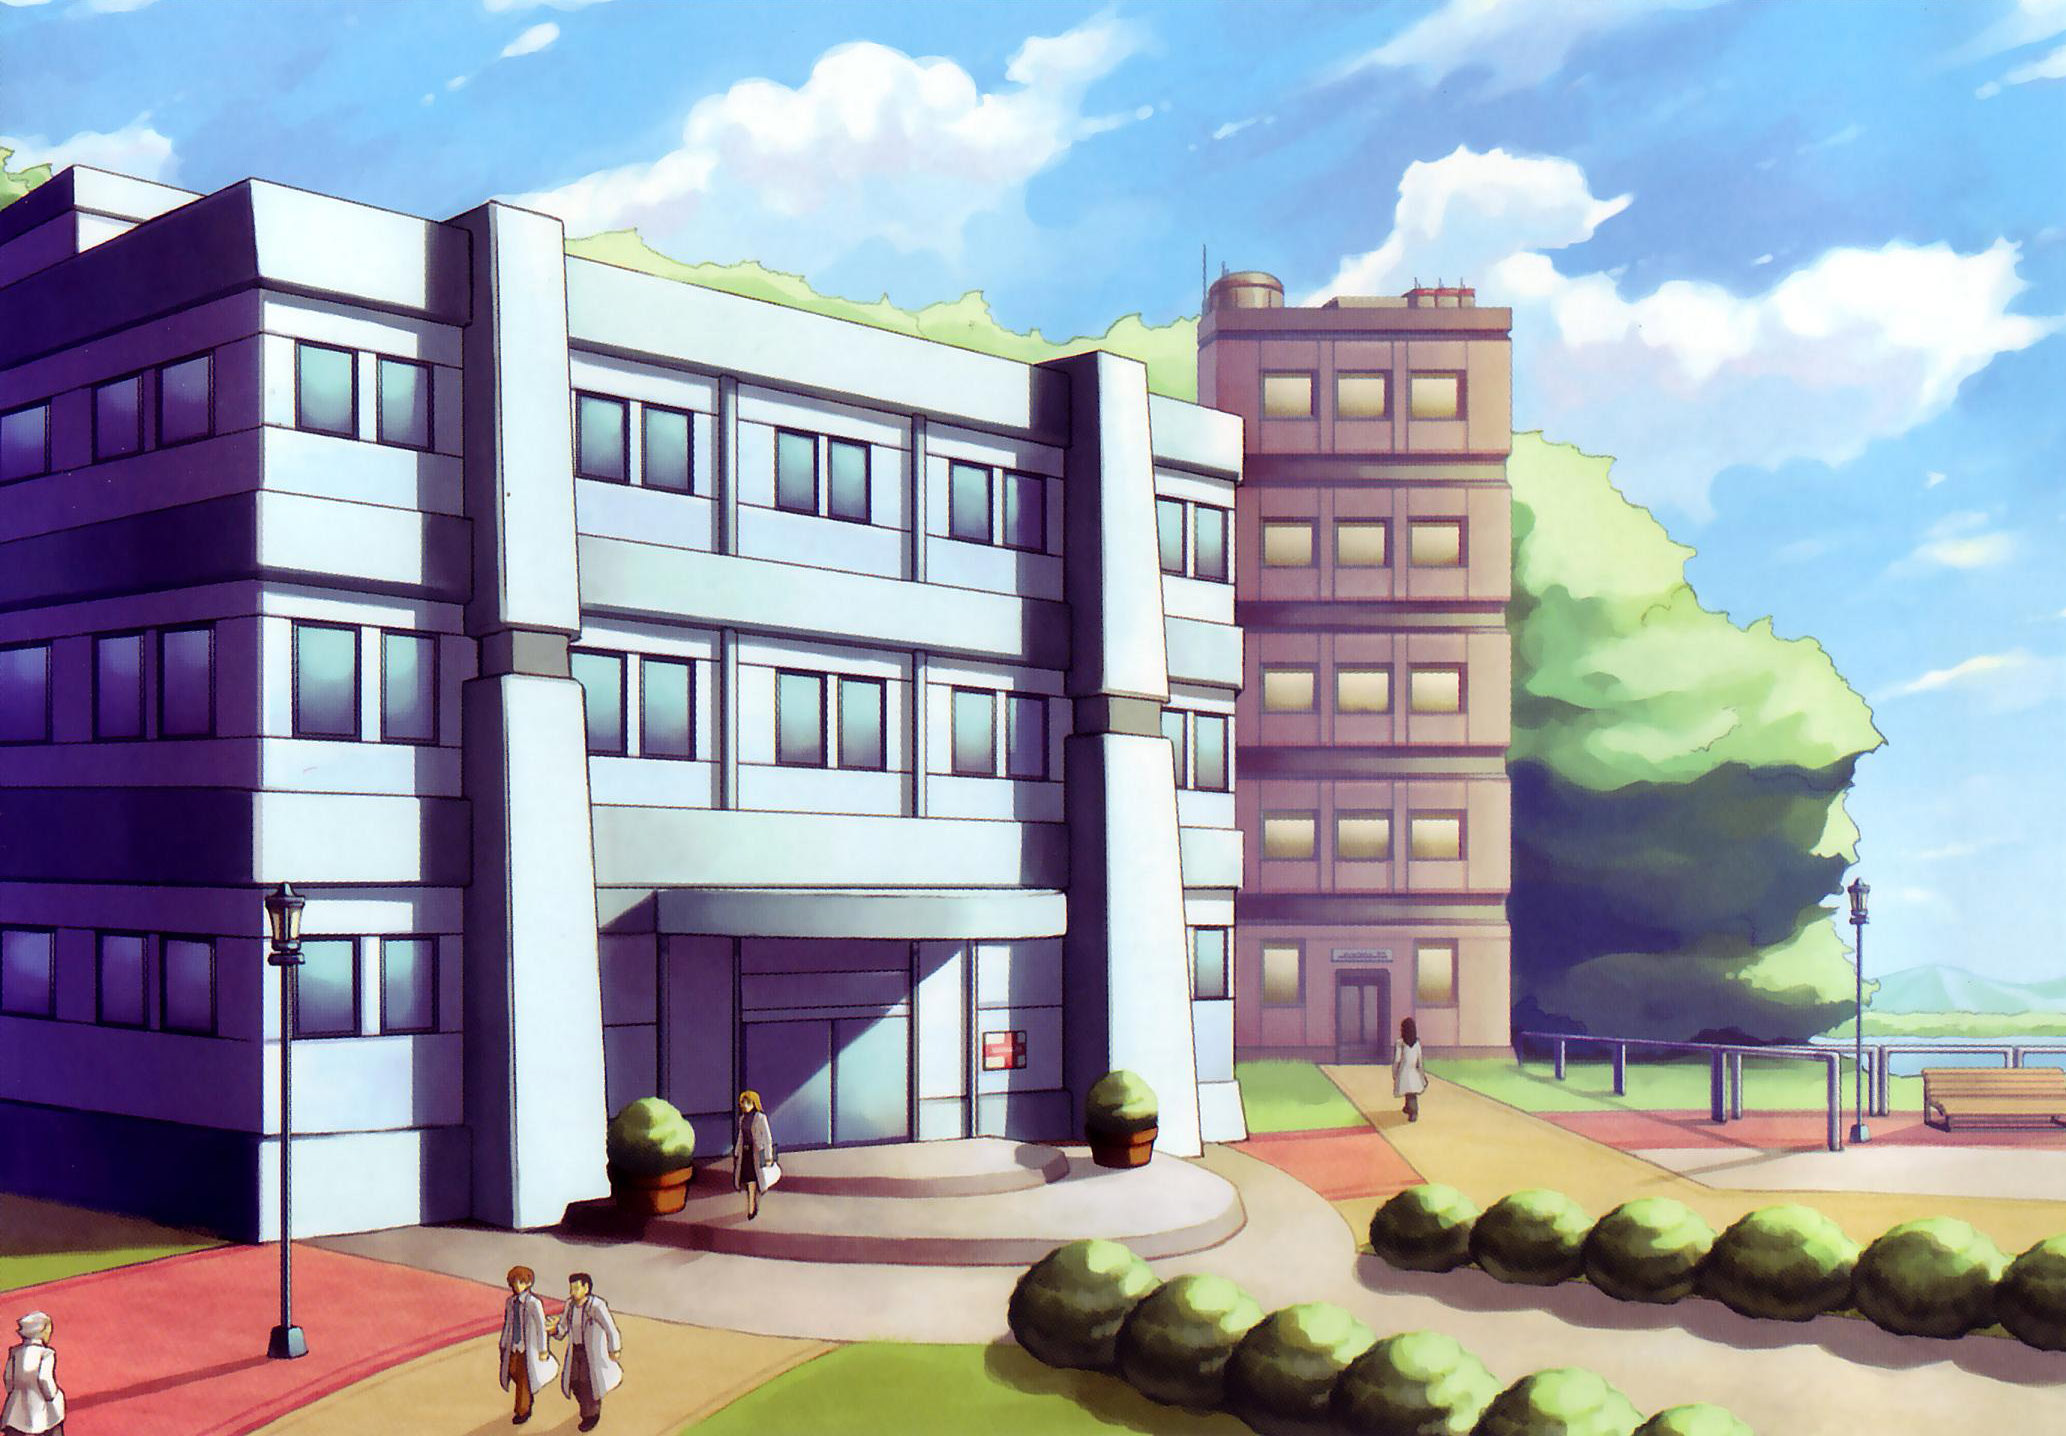
St. Ursula Medical College is financially supported by Remiferia. Since the enormous building also serves as a hospital, it is well known throughout Zemuria for treating foreign patients.
영웅전설 제로의 궤적
Background
The Special Support Section first travels to St. Ursula to investigate monster attacks on behalf of the Crossbell Guardian Force. After helping save the bus from jungle monsters with the assistance of Estelle and Joshua, they arrive at the hospital where Lloyd reunites with Cecile Neues, his late brother's fiancée.
Cecile takes them to Lytton, the victim of the monster attack who tells them and Doctor Joachim Guenter his story, and to the roof where the attack happened. The SSS investigate the area and determine the point of entry of the monsters to be the lower balcony of the inn. Then they meet Shizuku MacLaine, an inpatient of the hospital and daughter of Arios, who inadvertently gives Lloyd the key to the case when she tells them she heard a faint whistle on the night of the attack, which ended up being Revache's method of controlling the war hounds that attacked the intern.
During the Crossbell Anniversary Festival, the hospital receptionist requests the SSS to find Doctor Guenter, who's gone missing to fish at the Ursula Road sandbar with other Fisherman's Guild members. After a fishing duel with Lloyd, they return to the hospital.
After the Festival ends, the SSS take KeA to the hospital on the recommendation of Sister Marble to search for a solution to her missing memories, meeting with Doctor Guenter again, who is the head of the Neurology and Pharmacology Department. The doctor asks KeA to stay for a few days to perform some tests, but she refuses and runs away, ending up lost and meeting Shizuku at the rest area. Lloyd finds the two having become friends, with Arios arriving to visit her daughter, asking the SSS to have KeA visit frequently for sake, and they decide to not have KeA stay and look for her relatives by themselves for a while longer.

Hello there, beautiful. May I have a moment of your time?
Please be aware spoilers for 영웅전설 제로의 궤적 may be present in the following section. Hit [Show] on the right if the show must go on. Adios, amigos!
The SSS meet with Doctor Guenter again to ask him to run analysis on the blue pills they found on Gantz after his incident at Barca Casino with Lechter Arundel which resulted in the former falling unconscious. The doctor tells them of a cult that delevoped a drug called Gnosis with similar effects to those they saw on Gantz.
After Revache, Gantz, and other people go missing, and the SSS with Alex Dudley investigate Revache's headquarters for clues, discovering them to be the distributors of Gnosis, they decide to meet Guenter in person after he fails to call at the agreed time. Dudley tells them he's found Guenter to be Ernest Reis' physician, making the doctor the main suspect since Ernest showed the same symptoms as Gantz.
They find the bus heading to the hospital at the side of the road again, empty but with people's belongings inside, and they find the hospital taken over by brainwashed Revache members. With the help of Yin, the SSS liberates the visitors and staff, and enters the Research Ward where Ernest is waiting in Guenter's office to reveal the truth behind the cult and Gnosis, finding Tio Plato and Renne as victims of experiments, Speaker Hartmann as blackmail subject and KeA to be involved in a different way. Renne appears to ask the SSS to deliver a message to the Brights and a warning to them about KeA before leaving.
Maps
| 2F |
|---|

|
| 3F |
|---|

|
| 4F |
|---|

|
- Armored Doven Kaiser
- Octobrain
- Death Moon
- Mafioso - Machete: Story
- Mafioso - Pistol: Story
- Hellhound: Story
- Ernest: Story
| Key | Contents | Chest Quote |
|---|---|---|
| 1 |  Celestial Balm Celestial Balm
|
I swear I was just holding it for a friend. |
| 2 | Curia Balm
|
I have a sinking feeling in my chest. |
| 3 |  Scorpio Gem Scorpio Gem
|
The surgery to remove the foreign object was successful. The chest just needs to be closed up and allowed a full recovery. Good job. |
| 4 | EP Charge II
|
*cough* *cough*...*COUGH* *cough* Sorry about that. I'm feeling a bit conchested. |
| 5 |  EP Cut 3 EP Cut 3
|
I've heard if you interact with this chest 100 times while syncing your button presses perfectly to the BGM and having your entire party's levels be prime numbers, you'll unlock Arios as a permanent party member... |
| 6 |  Stellar Pendulum Stellar Pendulum
|
I am the renowned chest specialist, Dr. Trey Shure, PhD. Thank you for saving me from those hooligans. |
There we go, the end of spoilers. Thank you for your time!
Quests
- Monster Damage Investigation: St. Ursula Medical College is the second place attacked by monsters to be investigated.
- Rare Herb Retrieval: Doctor Lago asks the SSS to retrieve a medicinal herb from the church.
- Missing Doctor: Doctor Guenter has gone missing.
- KeA: The SSS take KeA to the hospital for help with her memory.
- State-Wide Overdue Book Retrieval: One of the books was borrowed by an intern.
- A Present for Father: Shizuku wants to make a gift to her father.
- Blue Pill Investigation: The SSS asks for Doctor Guenter's help with the blue pills.
- Drug Incident Investigation: The hospital is overrun by brainwashed mafia.
Shops
Le Lectier Inn
| Le Lectier Inn オーベルジュ《レクチェ》 |
|||
|---|---|---|---|
| Items Sold | |||
| 휴식 | 1인당 100 미라 | ||
 특제 비프 스튜 특제 비프 스튜 |
800 미라 | ||
| 숙성 어니언 수프 |
800 미라 | ||
| 티아의 약 |
200 미라 | ||
| 티아라의 약 |
800 미라 | ||
| 티아랄의 약[note 1] |
2000 미라 | ||
| EP 차지Ⅰ |
500 미라 | ||
| EP 차지Ⅱ[note 1] |
100 미라 | ||
| 세라스의 약 |
500 미라 | ||
| 아세라스의 약[note 1] |
2000 미라 | ||
| 연기 구슬 |
100 미라 | ||
| 배틀 스코프 |
100 미라 | ||
| 해독약 |
100 미라 | ||
| 연화 리퀴드 |
160 미라 | ||
| 절연 테이프 |
100 미라 | ||
| 해동 손난로 |
160 미라 | ||
| 이완 젤 |
100 미라 | ||
| 냉각 스프레이 |
160 미라 | ||
| 안약 |
100 미라 | ||
| 민트 드롭 |
160 미라 | ||
| 각성제 |
200 미라 | ||
| 진정제 |
200 미라 | ||
| S-태블릿 |
500 미라 | ||
| 항균 마스크 |
800 미라 | ||
 벽걸이 시계[note 1] 벽걸이 시계[note 1] |
10000 미라 | ||
| Sepith Trade | |||
 = 20 mira = 20 mira |
 = 20 mira = 20 mira |
 = 20 mira = 20 mira |
 = 20 mira = 20 mira |
 = 30 mira = 30 mira |
 = 30 mira = 30 mira |
 = 30 mira = 30 mira |
|
Fishing
| Location | Fish | Bait |
|---|---|---|
.png) St. Ursula Medical College |
Carp | Earthworm (50%), Dumplings (50%), Deluxe Dumplings (33%), Snow Crab (100%) |
| Kasagin | Red Flies (100%) | |
| Pearlglass | Dumplings (50%), Deluxe Dumplings (33%) | |
| Snow Crab | Earthworm (50%) | |
| Trout | Roe (100%), Deluxe Dumplings (33%) | |
| Quote | If fishing at a hospital is wrong, I don't want to be right. | |
영웅전설 벽의 궤적
Background
The new head of Neurology and Pharmacology, Professor Seiland, asks the SSS to recover the surveys from a few Gnosis patients before giving them the results of the Gnosis analysis. She also directs Shizuku MacLaine's latest operation, which results in a partial success in recovering her eyesight.
Hello there, beautiful. May I have a moment of your time?
Please be aware spoilers for 영웅전설 벽의 궤적 may be present in the following section. Hit [Show] on the right if the show must go on. Adios, amigos!
After KeA's ascension to Sept-Terrion of Zero, she fully heals Shizuku's eyesight, ending her stay in the hospital. Following Lloyd's escape from prison and his reunion with Wazy and Zeit, the hospital is the first place they visit to free the rest of the SSS. They defeat the small Crossbell Defense Force unit stationed and stay hidden from the rest of the force thanks to Wazy's Thaumaturgy, reuniting with Tio, Cecile, Ilya Platiere and the recovered Fran Seeker.
There we go, the end of spoilers. Thank you for your time!
Quests
- The Doctor is In: The new doctor of the hospital asks the SSS to obtain medical surveys.
- Riboten Remedy: A patient's sudden condition needs a special antidote.
- A Taste of Crossbell: Le Lectier Inn's dish is Elie's recommendation.
- Package Pandemonium: The second package has to be delivered to the nurses' station.
- Delivery Deception: A criminal steals medical supplies meant for the hospital.
- Statewide Assessment: Lloyd, Wazy and Zeit head to the hospital first and reunite with Tio.
Shops
Le Lectier Inn
| Le Lectier Inn オーベルジュ《レクチェ》 |
|||
|---|---|---|---|
| Items Sold | |||
| 휴식 | 1인당 100 미라 | ||
 크로스벨 타임즈 ①[note 1] 크로스벨 타임즈 ①[note 1] |
100 미라 | ||
| 크로스벨 타임즈 ②[note 2] |
100 미라 | ||
| 크로스벨 타임즈 ③[note 3] |
100 미라 | ||
| 크로스벨 타임즈 ④[note 4] |
100 미라 | ||
| 크로스벨 타임즈 ⑤[note 5] |
100 미라 | ||
| 크로스벨 타임즈 ⑥[note 6] |
100 미라 | ||
| 크로스벨 타임즈 ⑦[note 7] |
100 미라 | ||
| 크로스벨 타임즈 ⑧[note 7] |
100 미라 | ||
| 크로스벨 타임즈 ⑨[note 8] |
100 미라 | ||
| 크로스벨 타임즈 호외[note 9] |
100 미라 | ||
| 크로스벨 타임즈 ⑩[note 10] |
100 미라 | ||
| 정성 스튜 |
1200 미라 | ||
| 매지컬 수프 |
300 미라 | ||
| 사흘 정성 스튜[note 11] |
1800 미라 | ||
| 혼돈탕 ≪탁≫[note 11] |
1200 미라 | ||
| 티아의 약 |
200 미라 | ||
| 티아라의 약 |
800 미라 | ||
| 티아랄의 약[note 12] |
2000 미라 | ||
| EP 차지Ⅰ |
500 미라 | ||
| EP 차지Ⅱ[note 12] |
2000 미라 | ||
| 세라스의 약 |
500 미라 | ||
| 아세라스의 약[note 12] |
2500 미라 | ||
| S-태블릿 |
500 미라 | ||
| 큐리아의 약 |
1500 미라 | ||
| 수술용 장갑 |
800 미라 | ||
| 폼 쿠션[note 13] |
500 미라 | ||
| Sepith Trade | |||
| = 20 mira |
= 20 mira |
= 20 mira |
= 20 mira |
| = 30 mira |
= 30 mira |
= 30 mira |
|
- ↑ Only available in Chapter 1 and Chapter 2 except the final day.
- ↑ Only available in Chapter 2.
- ↑ Only available on the final day of Chapter 2.
- ↑ Only available in the Intermission and Chapter 3 except the last day.
- ↑ Only available in Chapter 3.
- ↑ Only available on the final day of Chapter 3.
- ↑ 7.0 7.1 Only available on the first day of Chapter 4.
- ↑ Only available on the second day of Chapter 4.
- ↑ Only available on the second day of Chapter 4 and the Finale before entering Crossbell City.
- ↑ Only available in the Finale.
- ↑ 11.0 11.1 Only available from the third day of Chapter 3 onwards.
- ↑ 12.0 12.1 12.2 Only available from Chapter 3 onwards.
- ↑ Only available until the end of the first day of Chapter 4.
Fishing
| Location | Fish | Bait |
|---|---|---|
.png) St. Ursula Medical College |
Turtle | Dumplings (100%), Deluxe Dumplings (100%) |
| Piranha | Snow Crab (50%), Kasagin (50%) | |
| Eel | Earthworm (100%) | |
| Pirarucu | Rainbow Gem EX (100%), Snow Crab (50%), Kasagin (50%), Carp (100%) | |
| Quote | I can always count on St. Ursula to fill my prescription for fishin'. | |
영웅전설 섬의 궤적 IV
Background
Some time between S.1204 and S.1206, the previous Head Nurse retired and Cecile Neues became the new Head Nurse.
Emperor Eugent Reise Arnor III was taken to St. Ursula after being shot during the Heimdallr Summer Festival. New Class VII head to the hospital looking for Valerie, but they notice Supreme Commander Vandyck and Governor General Rufus Albarea have arrived for a visit as well, hiding in the nurse station with Grace Lynn and Valerie. Vandyck finds them anyways and speaks with them before leaving the hospital.
Cecile takes them to see the emperor, who has awakened from the coma before Professor Seiland carries out the surgery he needs. He gives them the information the Black Records revealed before falling asleep again. Afterwards, they notice Rufus hasn't left with Vandyck, but has gone to the Wetlands, stationing the Imperial Defense Force and preventing them from searching the area for the final singularity. Stark provides them with an orbal boat to head to Mishelam and access the wetlands from the opposite side instead.
Quests
- Crossbell Singularity: New Class VII speak with the emperor and travel to Mishelam by boat to bypass the IDF.
Shops
Le Lectier Inn
| Le Lectier Inn ビュッフェ&イン《レクチェ》 |
|||
|---|---|---|---|
| Items Sold | |||
| Common Items | |||
| Newspapers | |||
 의료용 장갑 의료용 장갑 |
3200 미라 | ||
 궁정식 하이라이스 궁정식 하이라이스 |
1200 미라 | ||
 재료 듬뿍 하이라이스 재료 듬뿍 하이라이스 |
1100 미라 | ||
| Sepith Trade | |||
 = 0 mira = 0 mira |
 = 0 mira = 0 mira |
 = 0 mira = 0 mira |
 = 0 mira = 0 mira |
 = 0 mira = 0 mira |
 = 0 mira = 0 mira |
 = 0 mira = 0 mira |
 = 20 mira = 20 mira |
Fishing
| Location | Fish | |||
|---|---|---|---|---|
.jpg) St. Ursula Medical College |
Flamear Ojo [note 1] | |||
- ↑ Only after speaking with Kenneth from 8/30 onwards.
Organisation
Hospital
- Professor Seiland
- Doctor Lago Nixon
- Doctor Gailey Reutzel
- Doctor Joachim Guenter
- Chief Ursuline
- Doctor Belldine
Residency
- Lytton
- Gwen
- Chaleur
- Flora
- Michaud
- Luc
Nurses
- Head Nurse Martha
- Cecile Neues
- Lan
- Cirone
- Philia
- Meifa
- Ada
- Jenny
Patients
- Shizuku MacLaine
- Michael
- Old Lady Yaila
- Nena
- Marty
- Vanson
Others
- Chief Clark
- Receptionist Sera
- Superintendent Kirsch (Le Lectier Inn/Buffet & Inn - Lectier)
- Marone
- Janitor Dyson
- Security Guard Tony
- Lieri
- Old Man Ordo (Obitt in 영웅전설 시작의 궤적)
Departments
- Neurology Department (previously managed by Dr. Joachim Guenter; currently managed by Professor Seiland)
- Pharmacology Department (previously managed by Dr. Joachim Guenter; currently managed by Professor Seiland)
- Surgical Department (managed by Dr. Gailey Reutzel)
- Internal Medicine Department (managed by Dr. Lago Nixon)
- Biomedical Engineering Department (managed by Chief Ursuline)
See also
Gallery
-
-
-
-
 Concept Art
 -
 Concept Art
 -
 Concept Art
 -
 St. Ursula Medical College
 -
 St. Ursula Medical College Reception
 -
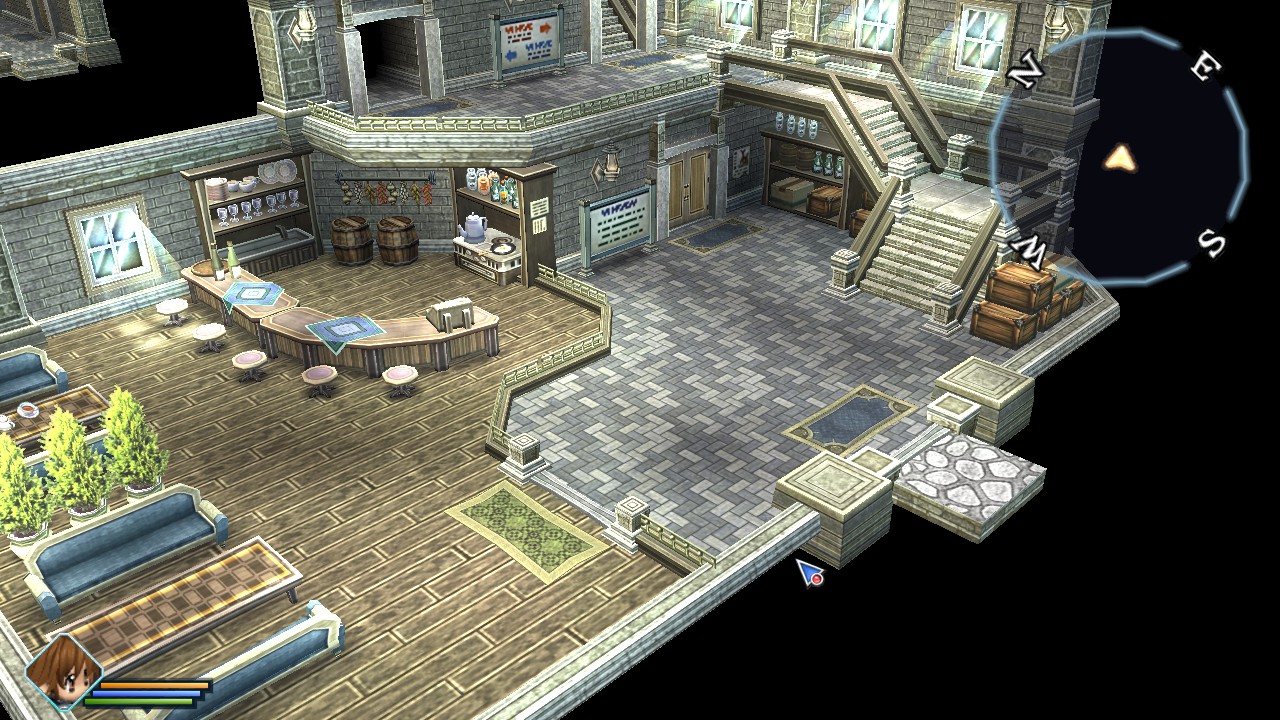 St. Ursula Medical College Inn


.jpg)
.jpg)
.jpg)
.jpg)
.jpg)
.jpg)
-
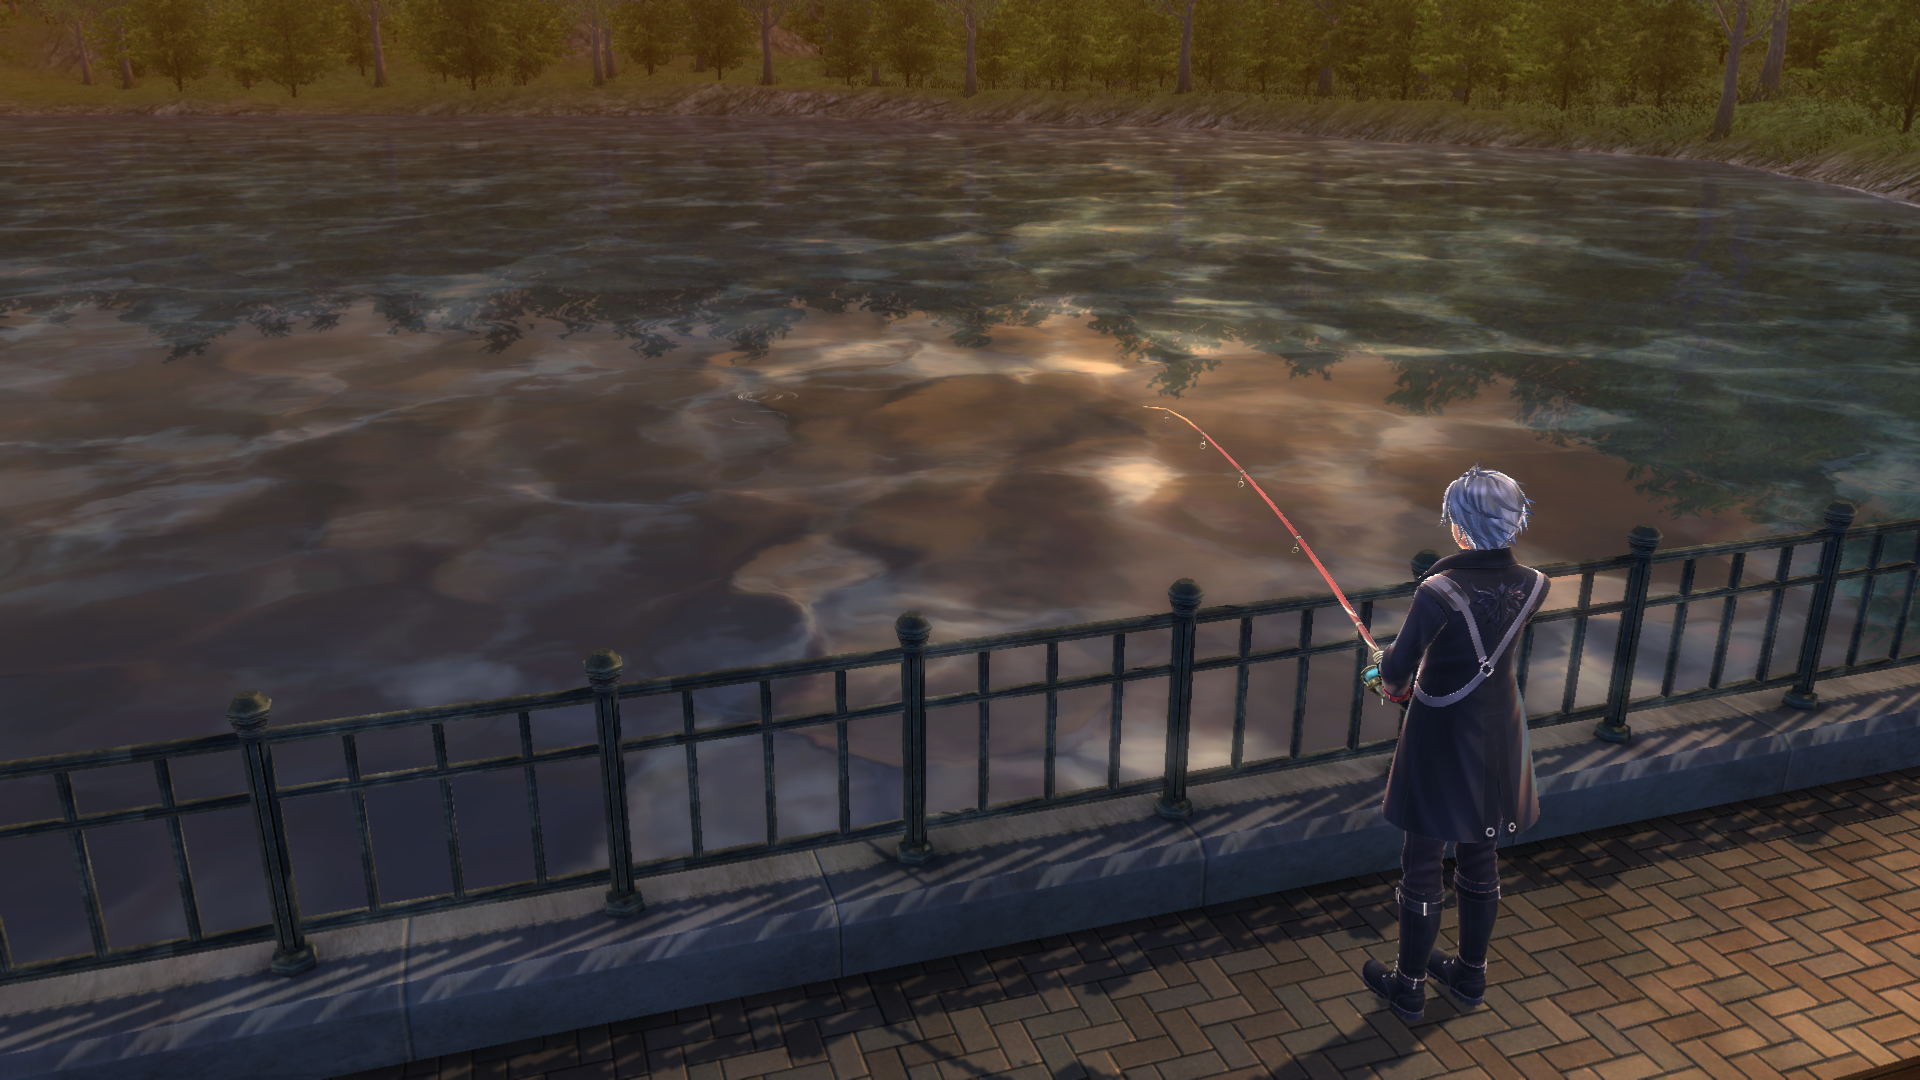 Fishing spot in 영웅전설 섬의 궤적 IV
_(Sen_IV).png)
-
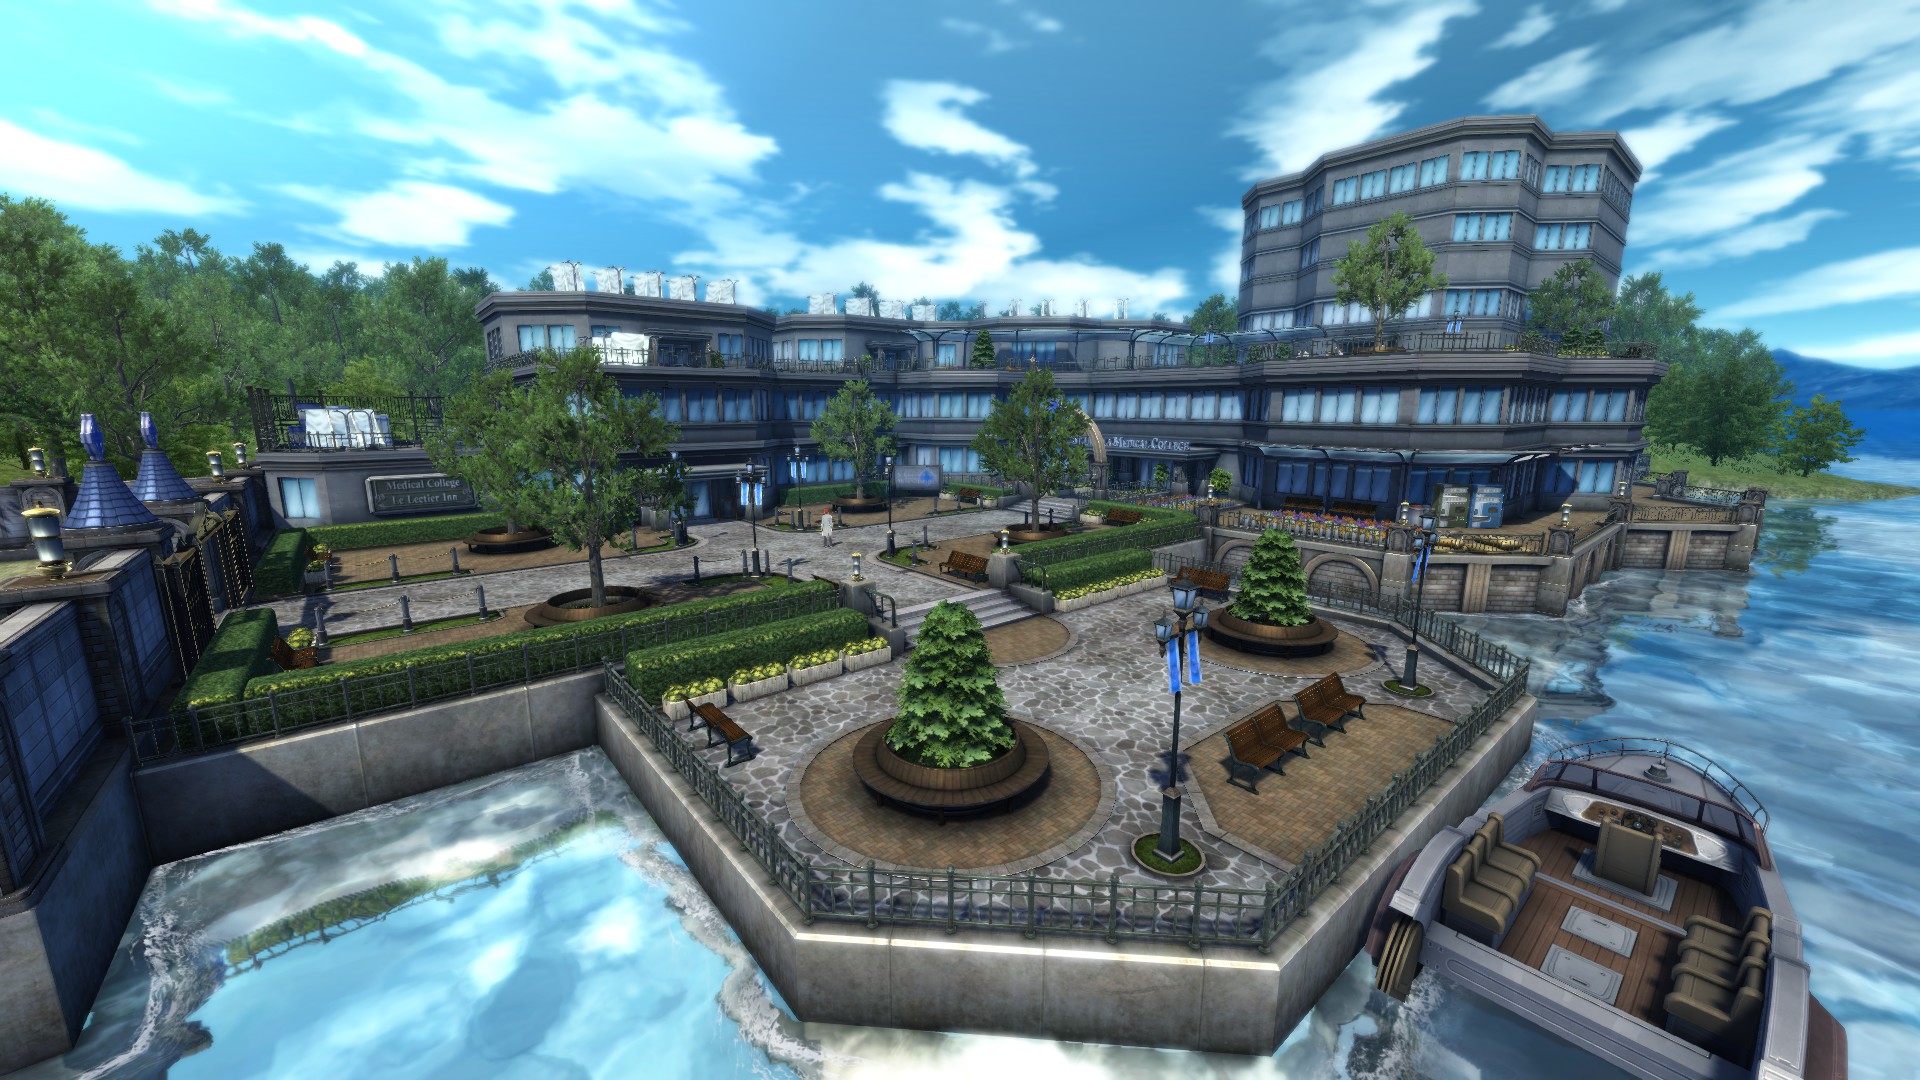 St. Ursula Medical College
 -
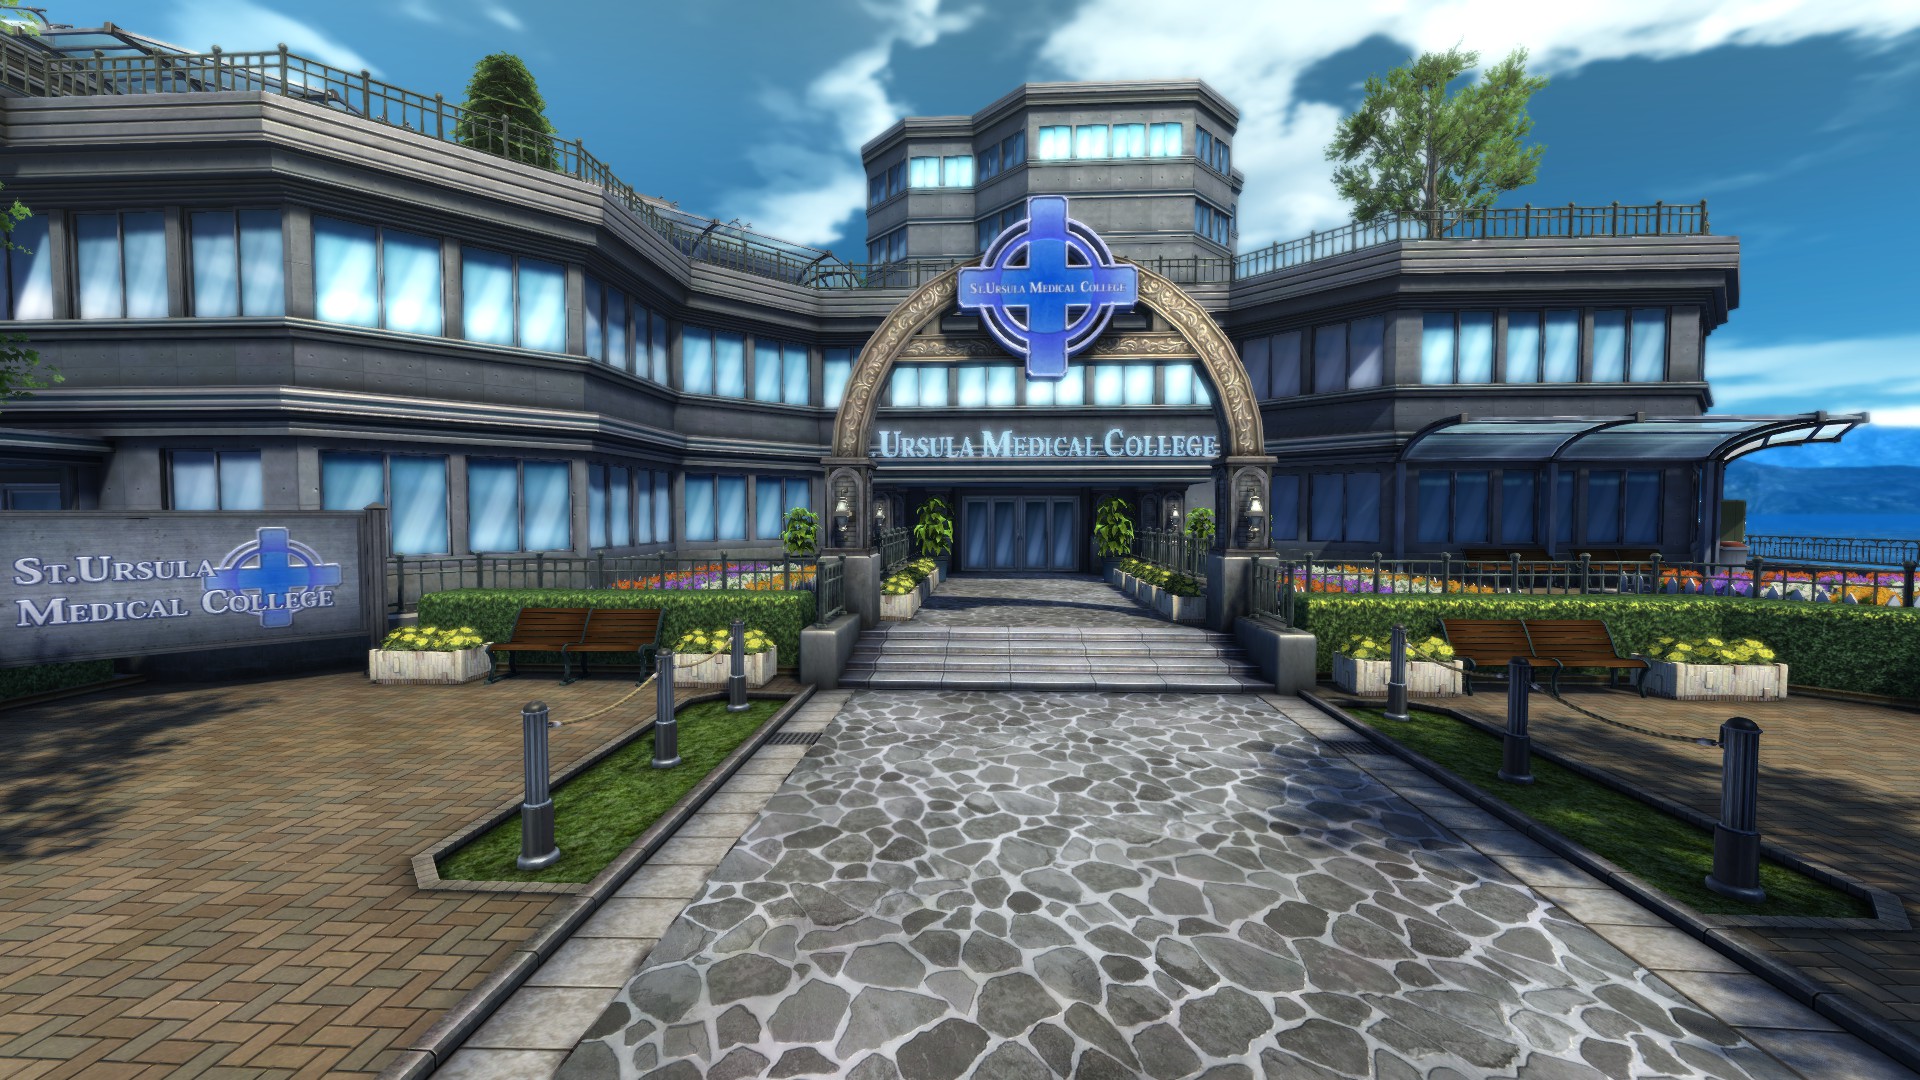 St. Ursula Medical College main building exterior
 -
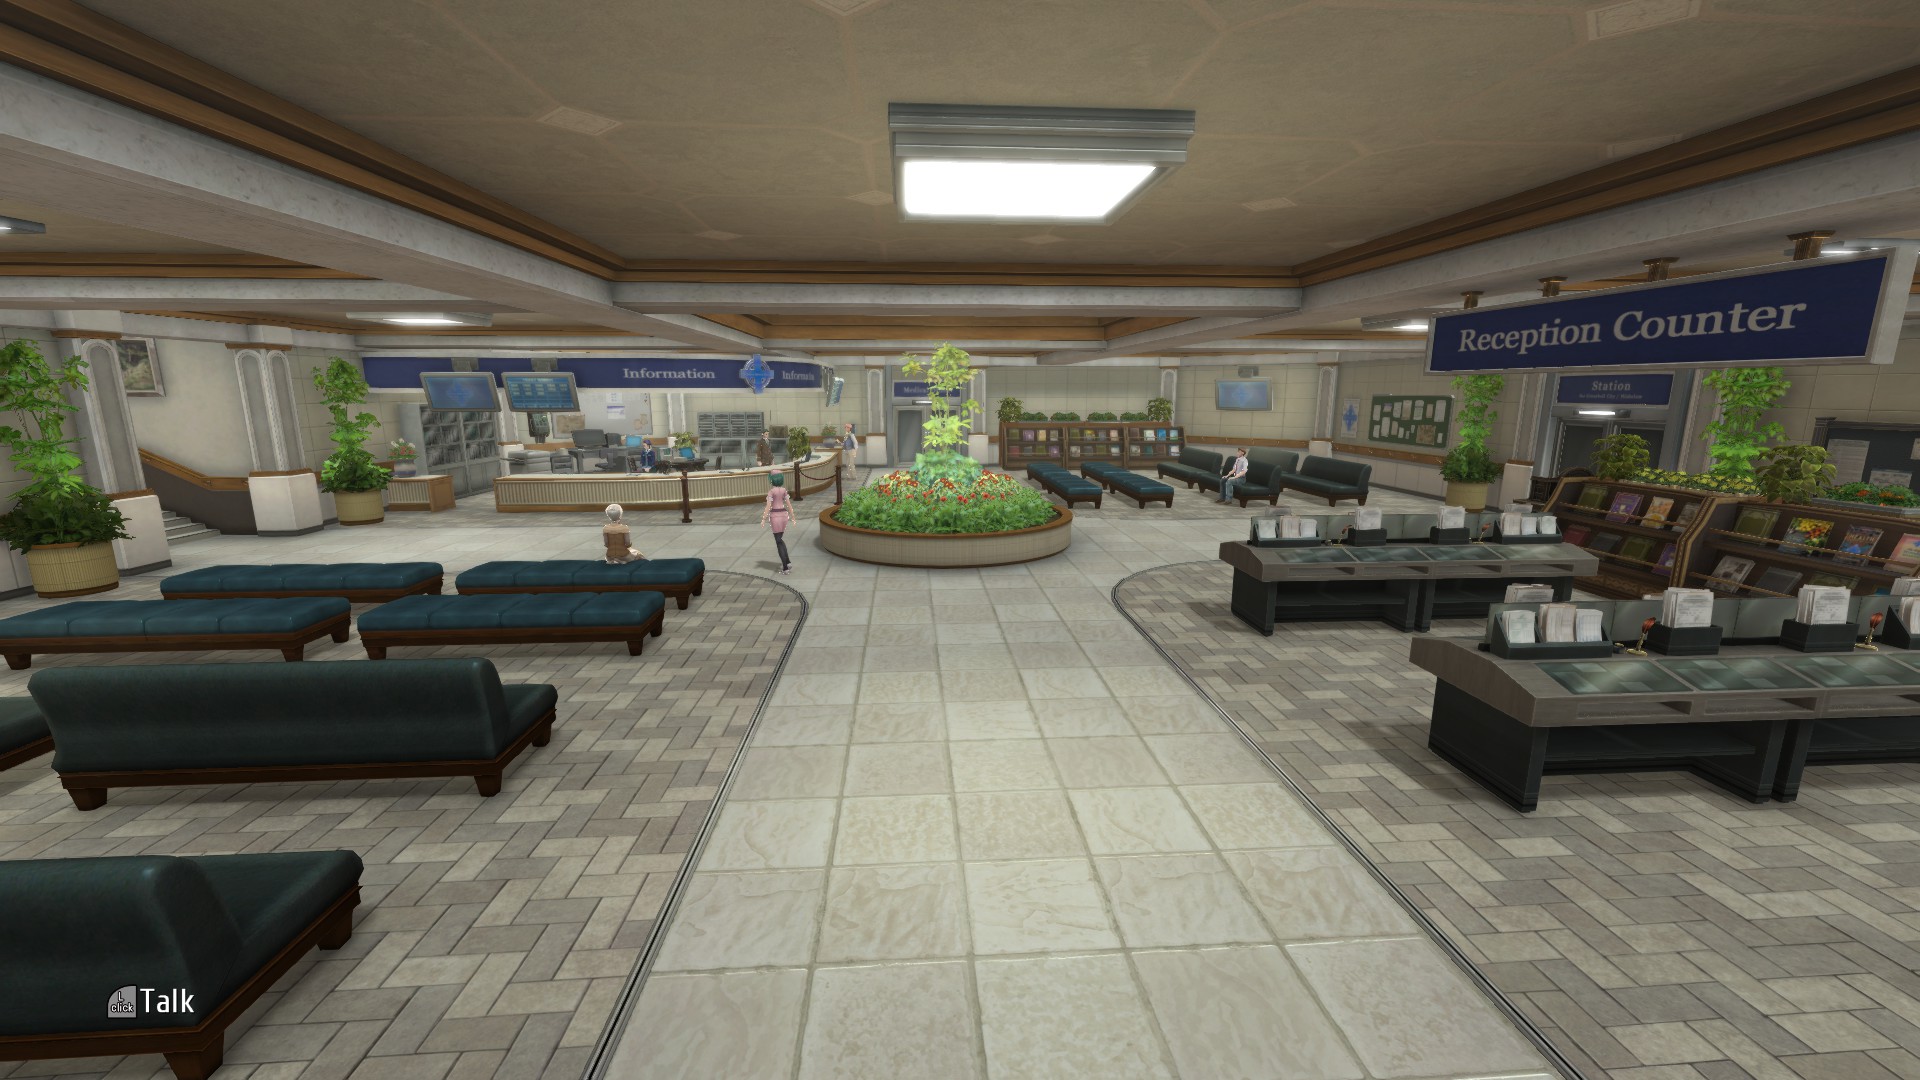 St. Ursula Medical College main building interior
 -
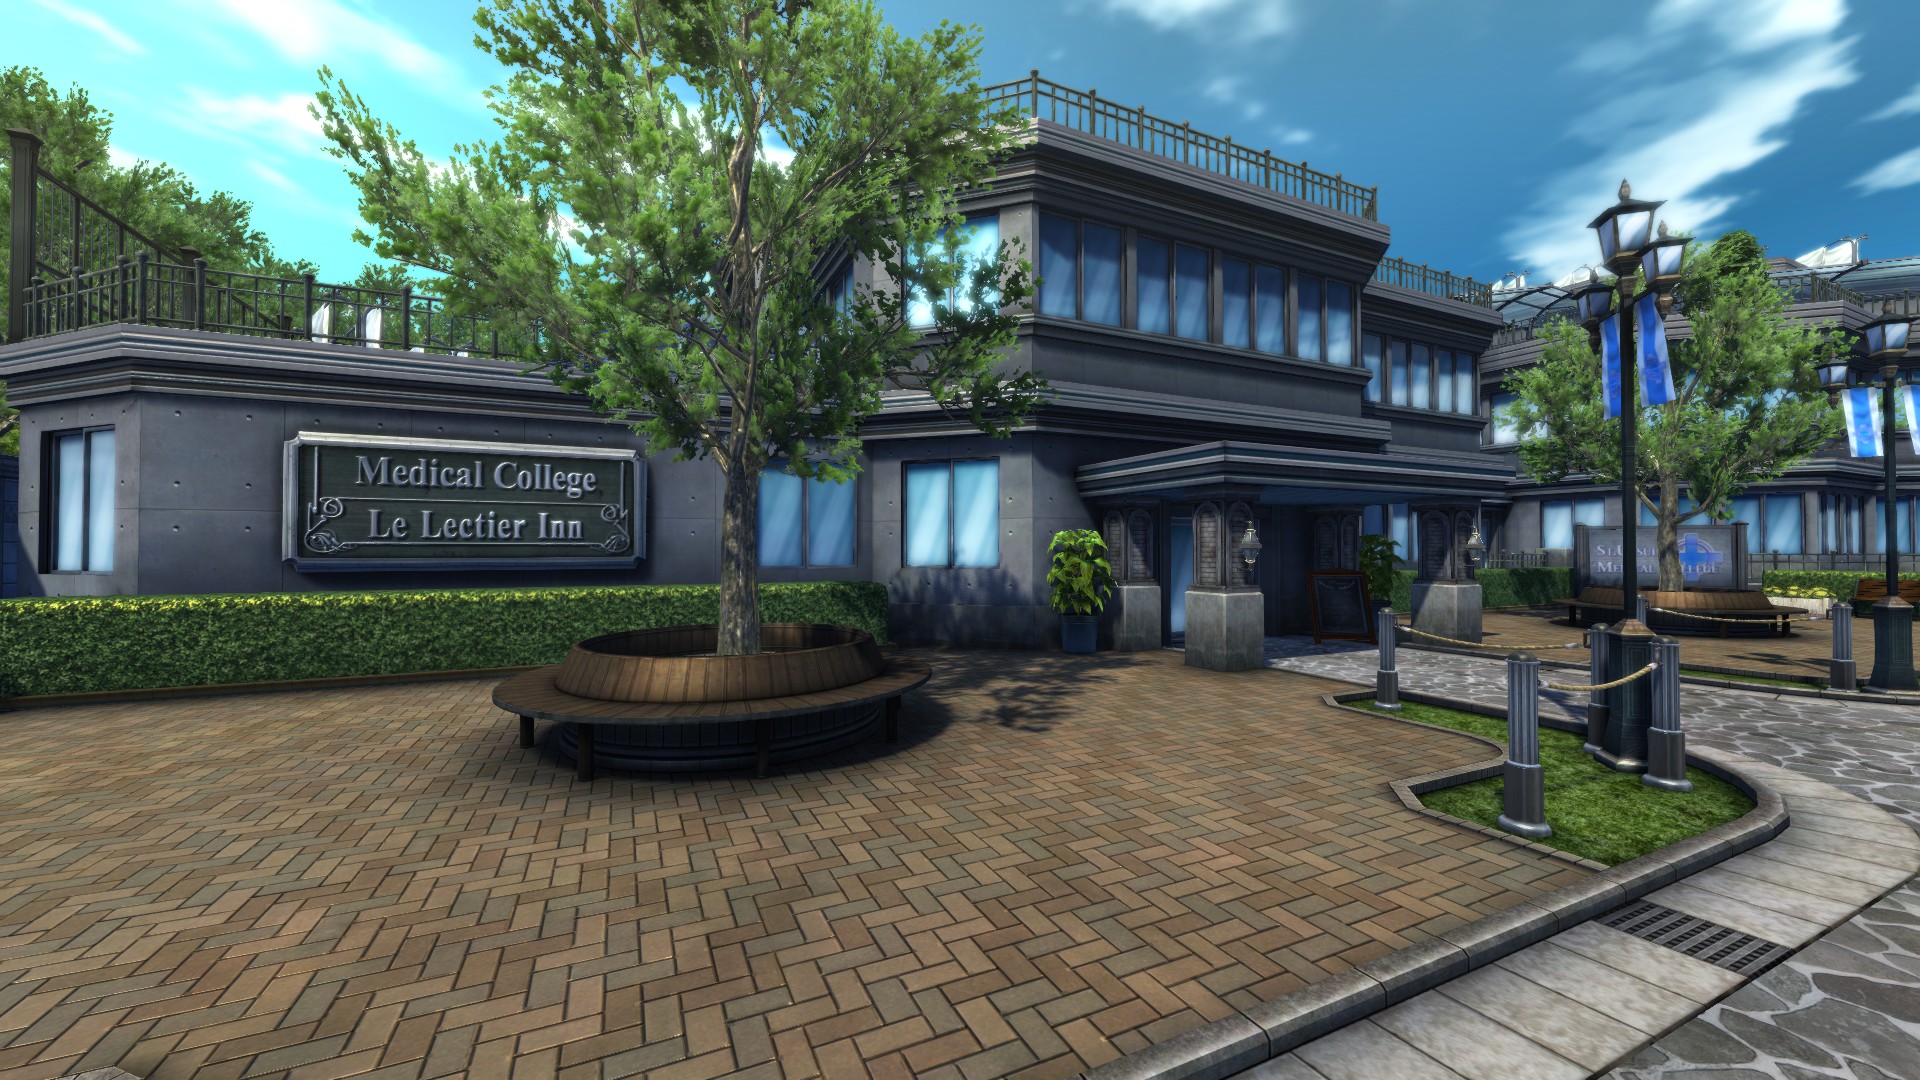 Le Lectier Inn
.jpg)
.jpg)
.jpg)
.jpg)
.png)
Map of Crossbell State
 | |
|---|---|
| <imagemap>
Image:Crossbell_State_(Map).png|upright 4.5|frameless|center desc none poly 342 107 304 124 311 156 350 204 459 291 423 317 436 371 465 377 476 394 483 387 474 364 447 353 439 324 475 299 475 274 422 243 448 217 448 173 440 173 438 210 412 233 356 186 317 132 345 115 Mainz Mountain Path poly 540 396 615 375 650 334 749 329 789 347 817 344 821 353 788 364 731 345 655 351 623 390 542 409 East Crossbell Highway poly 713 333 679 292 678 265 629 176 636 169 696 261 694 287 729 315 724 333 Old Armorica Road poly 656 203 683 182 691 154 782 120 788 126 700 163 693 189 662 213 Ancient Battlefield poly 494 443 463 515 405 528 394 544 377 518 368 519 379 558 410 558 422 536 457 531 433 569 387 593 383 620 401 641 408 633 400 608 459 577 509 445 Ursula Road poly 471 408 383 399 373 429 252 410 237 382 197 397 197 407 229 401 236 422 285 438 386 443 393 419 472 420 West Crossbell Highway poly 285 435 253 501 253 581 265 581 267 509 298 436 Knox Forest Road circle 507 411 38 Crossbell City circle 624 164 14 Armorica Village circle 354 107 14 Mainz circle 413 644 14 St. Ursula Medical College circle 680 581 14 Mishelam circle 62 384 14 Garrelia Fortress circle 975 274 14 Altair circle 830 345 14 Tangram Gate circle 186 402 14 Bellguard Gate circle 497 353 8 Crossbell Cathedral circle 444 167 8 Rosenberg Studio circle 260 590 12 Crossbell Police Academy rect 730 377 814 400 Boathouse rect 240 539 333 560 Knox Forest rect 263 61 352 82 Mainz Mine rect 237 99 306 121 Old Mine rect 507 628 647 680 Wetlands circle 372 508 12 Stargazer's Tower circle 246 171 12 Moon Temple circle 792 117 12 Sun Fort circle 425 610 10 Stella Shrine </imagemap> | |