
| Outside |
|---|

|
주노 해상 요새: 두 판 사이의 차이
kiseki
다른 명령
knergy>Callum5211 |
잔글 Knergy님이 Juno Naval Fortress 문서를 주노 해상 요새 문서로 이동했습니다: Localize title to glossary Korean |
||
| (같은 사용자의 중간 판 7개는 보이지 않습니다) | |||
| 1번째 줄: | 1번째 줄: | ||
{{ | {{InfoRoad | ||
|title1 = Juno Fortress | |||
|image1 = Juno Fortress - Concept Art (Sen III).PNG | |image1 = Juno Fortress - Concept Art (Sen III).PNG | ||
| | |game = {{g|Sen III IV}} | ||
|country = [[Erebonia]] | |||
|region = [[Lamare Province]] | |||
|northloc = | |||
| | |westloc = | ||
|eastloc = | |||
}}'''Juno Naval Fortress''' (ジュノー海上要塞) | |southloc = [[West Lamare Highway]] | ||
}}'''Juno Naval Fortress''' (ジュノー海上要塞) is a military installation in the [[Lamare Province]], [[Erebonia]]. | |||
== Background == | == Background == | ||
Juno is an naval fortress originally built in the [[Dark Ages]], but continuously renovated. | Juno is an naval fortress originally built in the [[Dark Ages]], but continuously renovated. | ||
During the [[Middle Ages]] a navy called the Knights of the Sea | During the [[Middle Ages]] a navy called the Knights of the Sea (海の騎士団) was established in the naval fortress to deal with piracy in [[Ordis]], which has been known as a prosperous city since antiquity.<ref name="Sen3-060618" /> The Order fought many large-scale naval battles against the pirates near the coast of Ordis. | ||
During the [[Erebonian Civil War]], Juno served as the headquarters of the [[Noble Alliance]]. After the [[Imperial Army of Erebonia]] and [[Rufus Albarea]] of the Noble Alliance concluded on a ceasefire, | During the [[Erebonian Civil War]], Juno served as the headquarters of the [[Noble Alliance]]. After the [[Imperial Army of Erebonia]] and [[Rufus Albarea]] of the Noble Alliance concluded on a ceasefire, a group of soldiers by General [[Aurelia Le Guin]], commander of the Lamare Provincial Army, held the fortress under siege until August S.1205. Their force at the time consisted of 50,000 soldiers, enormous airships, enough supplies to extend their siege for 3 years and fully equipped anti-aircraft artillery. Even the Imperial Army was perplexed on how to deal with the situation.<ref name="Sen3-3" /> | ||
The Imperial Government extended a deal to General Aurelia: to lead the invasion into [[North Ambria]] in exchange for a pardon. She accepted the deal, and after the [[Northern War]], Juno became the headquarters of the '''Unified Regions Army''' (統合地方軍), the fusion of the former Provincial Armies, under command of Brigadier General [[Wallace Bardias]]. | |||
== {{g|Sen III}} == | == {{g|Sen III}} == | ||
=== Background === | === Background === | ||
During [[Thors Branch Campus]]' third field exercise, [[Class VII]] heads to Juno to coordinate with Brigadier General Bardias. They're ordered to investigate potential jaeger activity in the area while the Unified Regions Army is occupied handling security for the upcoming Imperial Provincial Council in [[Ordis]]. | |||
On the day of the Council, Ordis is attacked by the [[Railway Cannon]]s meant for Juno that were stolen by the forces of [[Ouroboros]], the [[Red Constellation]] and the [[Northern Jaegers]]. Marquis [[Wilhelm Ballad]] orders Bardias to recover the cannons, leaving Ordis and the fortress undefended. | |||
After leaving the retake of the cannons in the [[Languedoc Canyon]] to the rest of the branch campus and Bardias' forces, [[Class VII]] heads to Juno only to find that Ouroboros and the Northern Jaegers have already taken it. [[Zephyr]] and [[Crow Armbrust|Azure Siegfried]] stand at the gate waiting for their moment to strike, but they decide to let Class VII retake the fortress once Aurelia Le Guin arrives to lead them. | |||
At the top of the fortress, they find the [[Aion Type-αII]] and [[Arianrhod]] and the [[Stahlritter]]. Aurelia and Class VII are able to defeat them, and after [[Valimar]] and the Panzer Soldats disable the Aion, Arianrhod summons [[Argreion]] and destroys it singlehandedly before leaving. | |||
=== Maps === | === Maps === | ||
<tabber> | |||
|-|Outside= | |||
{| class="article-table" style="width:100%" | |||
!Outside | |||
|- | |||
|style="text-align:center"|[[File:Juno Naval Fortress Outside.png|borderless]] | |||
|} | |||
|-|1F= | |||
{| class="article-table" style="width:100%" | |||
!1F | |||
|- | |||
|style="text-align:center"|[[File:Juno Naval Fortress 1F.png|borderless]] | |||
|} | |||
|-|2F= | |||
{| class="article-table" style="width:100%" | |||
!2F | |||
|- | |||
|style="text-align:center"|[[File:Juno Naval Fortress 2F.png|borderless]] | |||
|} | |||
|-|2F Exterior= | |||
{| class="article-table" style="width:100%" | |||
!2F Exterior | |||
|- | |||
|style="text-align:center"|[[File:Juno Naval Fortress 2F Exterior.png|borderless]] | |||
|} | |||
|-|Junction= | |||
{| class="article-table" style="width:100%" | |||
!Junction | |||
|- | |||
|style="text-align:center"|[[File:Juno Naval Fortress Junction.png|borderless]] | |||
|} | |||
|-|3F Lower= | |||
{| class="article-table" style="width:100%" | |||
!3F Lower | |||
|- | |||
|style="text-align:center"|[[File:Juno Naval Fortress 3F Lower.png|borderless]] | |||
|} | |||
|-|3F Middle= | |||
{| class="article-table" style="width:100%" | |||
!3F Middle | |||
|- | |||
|style="text-align:center"|[[File:Juno Naval Fortress 3F Middle.png|borderless]] | |||
|} | |||
|-|3F Exterior= | |||
{| class="article-table" style="width:100%" | |||
!3F Exterior | |||
|- | |||
|style="text-align:center"|[[File:Juno Naval Fortress 3F Exterior.png|borderless]] | |||
|} | |||
|-|3F Upper= | |||
{| class="article-table" style="width:100%" | |||
!3F Upper | |||
|- | |||
|style="text-align:center"|[[File:Juno Naval Fortress 3F Upper.png|borderless]] | |||
|} | |||
|-|Roof= | |||
{| class="article-table" style="width:100%" | |||
!Roof | |||
|- | |||
|style="text-align:center"|[[File:Juno Naval Fortress Roof.png|borderless]] | |||
|} | |||
</tabber> | |||
=== [[List of enemies (Cold Steel III)/Juno Naval Fortress|Enemies]] === | === [[List of enemies (Cold Steel III)/Juno Naval Fortress|Enemies]] === | ||
{| class="article-table" style="width:100%;table-layout: fixed;text-align:center" | |||
!style="width:20%"|Enemy | |||
!1F | |||
!2F | |||
!3F | |||
|- | |||
|style="text-align:left"|[[List_of_enemies_(Cold_Steel_III)/Juno_Naval_Fortress#Brigadier General Bardias|'''Brigadier General Bardias - 1''']] | |||
|[[List_of_quests_(Cold_Steel_III)/Chapter_3/Raising_the_Bardias|Quest]] | |||
| | |||
| | |||
|- | |||
|style="text-align:left"|[[List_of_enemies_(Cold_Steel_III)/Juno_Naval_Fortress#Brigadier General Bardias 2|'''Brigadier General Bardias - 2''']] | |||
|[[List_of_quests_(Cold_Steel_III)/Chapter_3/Raising_the_Bardias|Quest]] | |||
| | |||
| | |||
|- | |||
|style="text-align:left"|[[List_of_enemies_(Cold_Steel_III)/Juno_Naval_Fortress#Sneak Gunner G|Sneak Gunner G]] | |||
|✓ | |||
|✓ | |||
|✓ | |||
|- | |||
|style="text-align:left"|[[List_of_enemies_(Cold_Steel_III)/Juno_Naval_Fortress#Sneak Gunner R|Sneak Gunner R]] | |||
|✓ | |||
|✓ | |||
|✓ | |||
|- | |||
|style="text-align:left"|[[List_of_enemies_(Cold_Steel_III)/Juno_Naval_Fortress#Sneak Gunner M|Sneak Gunner M]] | |||
|✓ | |||
|✓ | |||
|✓ | |||
|- | |||
|style="text-align:left"|[[List_of_enemies_(Cold_Steel_III)/Juno_Naval_Fortress#Phalanx J9|Phalanx J9]] | |||
|✓ | |||
|✓ | |||
|✓ | |||
|- | |||
|style="text-align:left"|[[List_of_enemies_(Cold_Steel_III)/Juno_Naval_Fortress#Saber Cougar|Saber Cougar]] | |||
|✓ | |||
|✓ | |||
|✓ | |||
|- | |||
|style="text-align:left"|[[List_of_enemies_(Cold_Steel_III)/Juno_Naval_Fortress#Northern Jaeger - Rifle|'''Northern Jaeger - Rifle''']] | |||
|✓ | |||
|✓ | |||
|✓ | |||
|- | |||
|style="text-align:left"|[[List_of_enemies_(Cold_Steel_III)/Juno_Naval_Fortress#Northern Jaeger - Greatsword|'''Northern Jaeger - Greatsword''']] | |||
|✓ | |||
|✓ | |||
|✓ | |||
|- | |||
|style="text-align:left"|[[List_of_enemies_(Cold_Steel_III)/Juno_Naval_Fortress#Zephyranthes|Zephyranthes]] | |||
| | |||
|A | |||
|✓ | |||
|- | |||
|style="text-align:left"|[[List_of_enemies_(Cold_Steel_III)/Juno_Naval_Fortress#Balancing Clown|Balancing Clown]] | |||
| | |||
|A | |||
|✓ | |||
|- | |||
|style="text-align:left"|[[List_of_enemies_(Cold_Steel_III)/Juno_Naval_Fortress#Sleipnir F2|'''Sleipnir F2''']] | |||
| | |||
| | |||
|[[List_of_quests_(Cold_Steel_III)/Chapter_3/Field Exercises - Ordis|Story (B)]] | |||
|- | |||
|style="text-align:left"|[[List_of_enemies_(Cold_Steel_III)/Juno_Naval_Fortress#Gespard Gerrod|Gespard Gerrod]] | |||
| | |||
|B | |||
|✓ | |||
|- | |||
|style="text-align:left"|[[List_of_enemies_(Cold_Steel_III)/Juno_Naval_Fortress#Duvalie the Swift|'''Duvalie the Swift''']] | |||
| | |||
| | |||
|[[List_of_quests_(Cold_Steel_III)/Chapter_3/Field Exercises - Ordis|Story (A)]] | |||
|- | |||
|style="text-align:left"|[[List_of_enemies_(Cold_Steel_III)/Juno_Naval_Fortress#Ines the Stout|'''Ines the Stout''']] | |||
| | |||
| | |||
|[[List_of_quests_(Cold_Steel_III)/Chapter_3/Field Exercises - Ordis|Story (Both)]] | |||
|- | |||
|style="text-align:left"|[[List_of_enemies_(Cold_Steel_III)/Juno_Naval_Fortress#Ennea the Sharp|'''Ennea the Sharp''']] | |||
| | |||
| | |||
|[[List_of_quests_(Cold_Steel_III)/Chapter_3/Field Exercises - Ordis|Story (Both)]] | |||
|- | |||
|style="text-align:left"|[[List_of_enemies_(Cold_Steel_III)/Juno_Naval_Fortress#Arianrhod the Steel Maiden|'''Arianrhod the Steel Maiden''']] | |||
| | |||
| | |||
|[[List_of_quests_(Cold_Steel_III)/Chapter_3/Field Exercises - Ordis|Story (A)]] | |||
|} | |||
=== [[List of treasure chests (Cold Steel III)|Treasure Chests]] === | === [[List of treasure chests (Cold Steel III)#Lamare Province|Treasure Chests]] === | ||
<div class="mw-collapsible mw-collapsed" data-expandtext="Show Treasures" data-collapsetext="Hide Treasures"> | |||
{| class="article-table" style="width:100%" | |||
! style="width:1%" |Map | |||
! style="width:1%" |Key | |||
!Contents | |||
|- | |||
|rowspan="4"|Main 1 | |||
!1A | |||
|{{Quartz|Mirage R|Sen III}} Galion Fort R | |||
|- | |||
!2A | |||
|{{Item|Potion|Sen III}} EP Charge IV | |||
|- | |||
!3A | |||
|{{Item|Accessory|Sen III}} Solemn Buckle | |||
|- | |||
!4A | |||
|{{Item|Cosmetic Hair|Sen III}} Silver Hair - Jusis / {{Item|Potion|Sen III}} Battle Scope, {{Item|Potion|Sen III}} Smoke Grenade | |||
|- | |||
|rowspan="2"|Sub 1 | |||
!1B | |||
|{{Item|U-Material|Sen III}} U-Material ×5 | |||
|- | |||
!2B | |||
|{{Item|Potion|Sen III}} Tear All Balm | |||
|- | |||
|rowspan="3"|Main 2 | |||
!5A | |||
|{{Quartz|Fire R|Sen III}} Zeruel Cannon R | |||
|- | |||
!6A | |||
|{{Item|Potion|Sen III}} Curia Balm ×5, {{Item|Potion|Sen III}} S-Tablet ×5 | |||
|- | |||
!7A | |||
|{{Quartz|Wind SR|Sen III}} Recuria SR | |||
|- | |||
|rowspan="3"|Sub 2 | |||
!3B | |||
|{{Sepith|Earth|Sen III}}{{Sepith|Water|Sen III}}{{Sepith|Fire|Sen III}}{{Sepith|Wind|Sen III}}{{Sepith|Time|Sen III}}{{Sepith|Space|Sen III}}{{Sepith|Mirage|Sen III}} All Sepith ×100 | |||
|- | |||
!4B | |||
|{{Item|Potion|Sen III}} Brave Seed | |||
|- | |||
!5B | |||
|{{Item|Potion|Sen III}} Power Potion II, {{Item|Potion|Sen III}} Shield Potion II, {{Item|Potion|Sen III}} Mind Potion II | |||
|- | |||
|rowspan="2"|Junction | |||
!8A | |||
|{{Item|Potion|Sen III}} Celestial Balm EX | |||
|- | |||
!9A | |||
|{{Quartz|Earth R|Sen III}} Gravion Hammer R | |||
|- | |||
|rowspan="5"|Main 3 | |||
!10A | |||
|{{Item|U-Material|Sen III}} U-Material ×5 | |||
|- | |||
!11A | |||
|{{Item|Potion|Sen III}} Spirit Incense | |||
|- | |||
!12A | |||
|{{Item|Potion|Sen III}} Zeram Powder | |||
|- | |||
!13A | |||
|{{Sepith|Earth|Sen III}}{{Sepith|Water|Sen III}}{{Sepith|Fire|Sen III}}{{Sepith|Wind|Sen III}}{{Sepith|Time|Sen III}}{{Sepith|Space|Sen III}}{{Sepith|Mirage|Sen III}} All Sepith ×100 | |||
|- | |||
!14A | |||
|{{Quartz|Space R|Sen III}} Seraphic Ring R | |||
|- | |||
|rowspan="2"|Sub 3 | |||
!6B | |||
|{{Quartz|Water SR|Sen III}} Seiryuu | |||
|- | |||
!7B | |||
|{{Item|Potion|Sen III}} Zeram Powder | |||
|}</div> | |||
=== [[List of quests (Cold Steel III)|Quests]] === | === [[List of quests (Cold Steel III)|Quests]] === | ||
*[[List_of_quests_(Cold_Steel_III)/Chapter_3/Raising_the_Bardias|Raising the Bardias]]: Wallace Bardias wants Class VII to help train recruits. | |||
*[[List_of_quests_(Cold_Steel_III)/Chapter_3/Mystery of the Old Map|Mystery of the Old Map]]: The second location is next to the bridge leading to the fortress. | |||
*[[List_of_quests_(Cold_Steel_III)/Chapter_3/Field Exercises - Ordis|Field Exercises - Ordis]]: Juno Naval Fortress is taken by Ouroboros and the Northern Jaegers after the distraction at Languedoc Canyon. | |||
== {{g|Sen IV}} == | |||
=== Background === | |||
After the [[Weissland Army]]'s defection, the [[3rd Armored Division (Imperial Army)|3rd Armored Division]] under [[Zechs Vander]] was stationed in the fortress to train the new divisions of drafted soldiers. | |||
=== Maps === | |||
{| class="article-table" style="width:100%" | |||
!Juno Naval Fortress | |||
|- | |||
|style="text-align:center"|[[File:Juno Naval Fortress Outside B.png|borderless]] | |||
|} | |||
=== [[List of quests (Cold Steel IV)|Quests]] === | |||
There are no quests in this location. | |||
== {{g|Hajimari}} == | == {{g|Hajimari}} == | ||
| 37번째 줄: | 292번째 줄: | ||
== Gallery == | == Gallery == | ||
<gallery> | <gallery> | ||
Juno Naval Fortress - Introduction (CS III).png|Introduction | Juno Naval Fortress - Introduction (CS III).png|Introduction | ||
Juno Naval Fortress (CS III).jpg|Juno Naval Fortress | |||
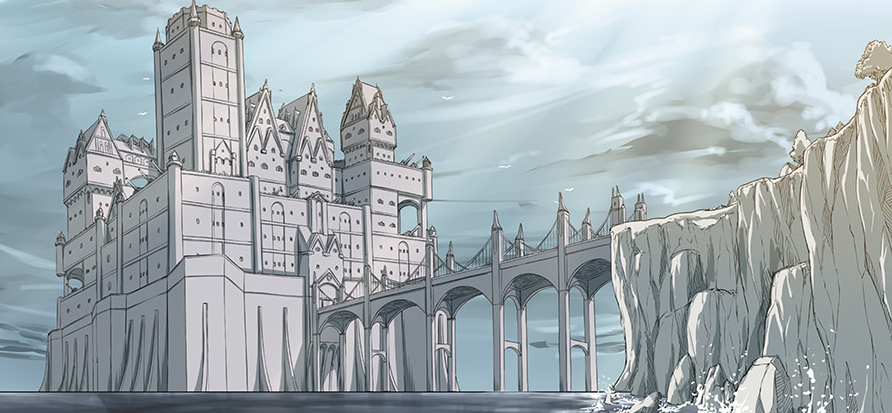
Juno Naval Fortress 1 - Concept Art (Sen III).png|Location artwork | Juno Naval Fortress 1 - Concept Art (Sen III).png|Location artwork | ||
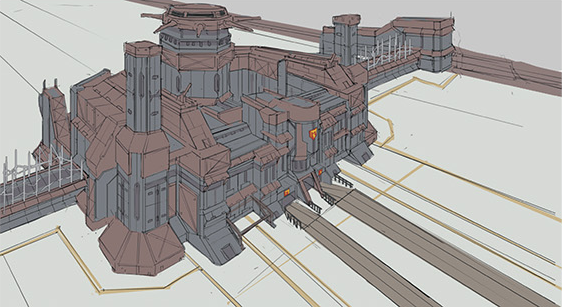
Juno Naval Fortress 2 - Concept Art (Sen III).png|Concept art | Juno Naval Fortress 2 - Concept Art (Sen III).png|Concept art | ||
| 52번째 줄: | 308번째 줄: | ||
{{ref/game|Sen III|3|06/18|name=Sen3-060618}} | {{ref/game|Sen III|3|06/18|name=Sen3-060618}} | ||
}} | }} | ||
{{Map Western Erebonia}} | |||
{{Nav Sen III}} | {{Nav Sen III}} | ||
[[Category:Erebonia Locations]] | [[Category:Erebonia Locations]] | ||
[[Category:Imperial Army of Erebonia]] | [[Category:Imperial Army of Erebonia]] | ||
[[Category:Destroyed Locations]] | [[Category:Destroyed Locations]] | ||
2026년 7월 29일 (수) 23:40 기준 최신판
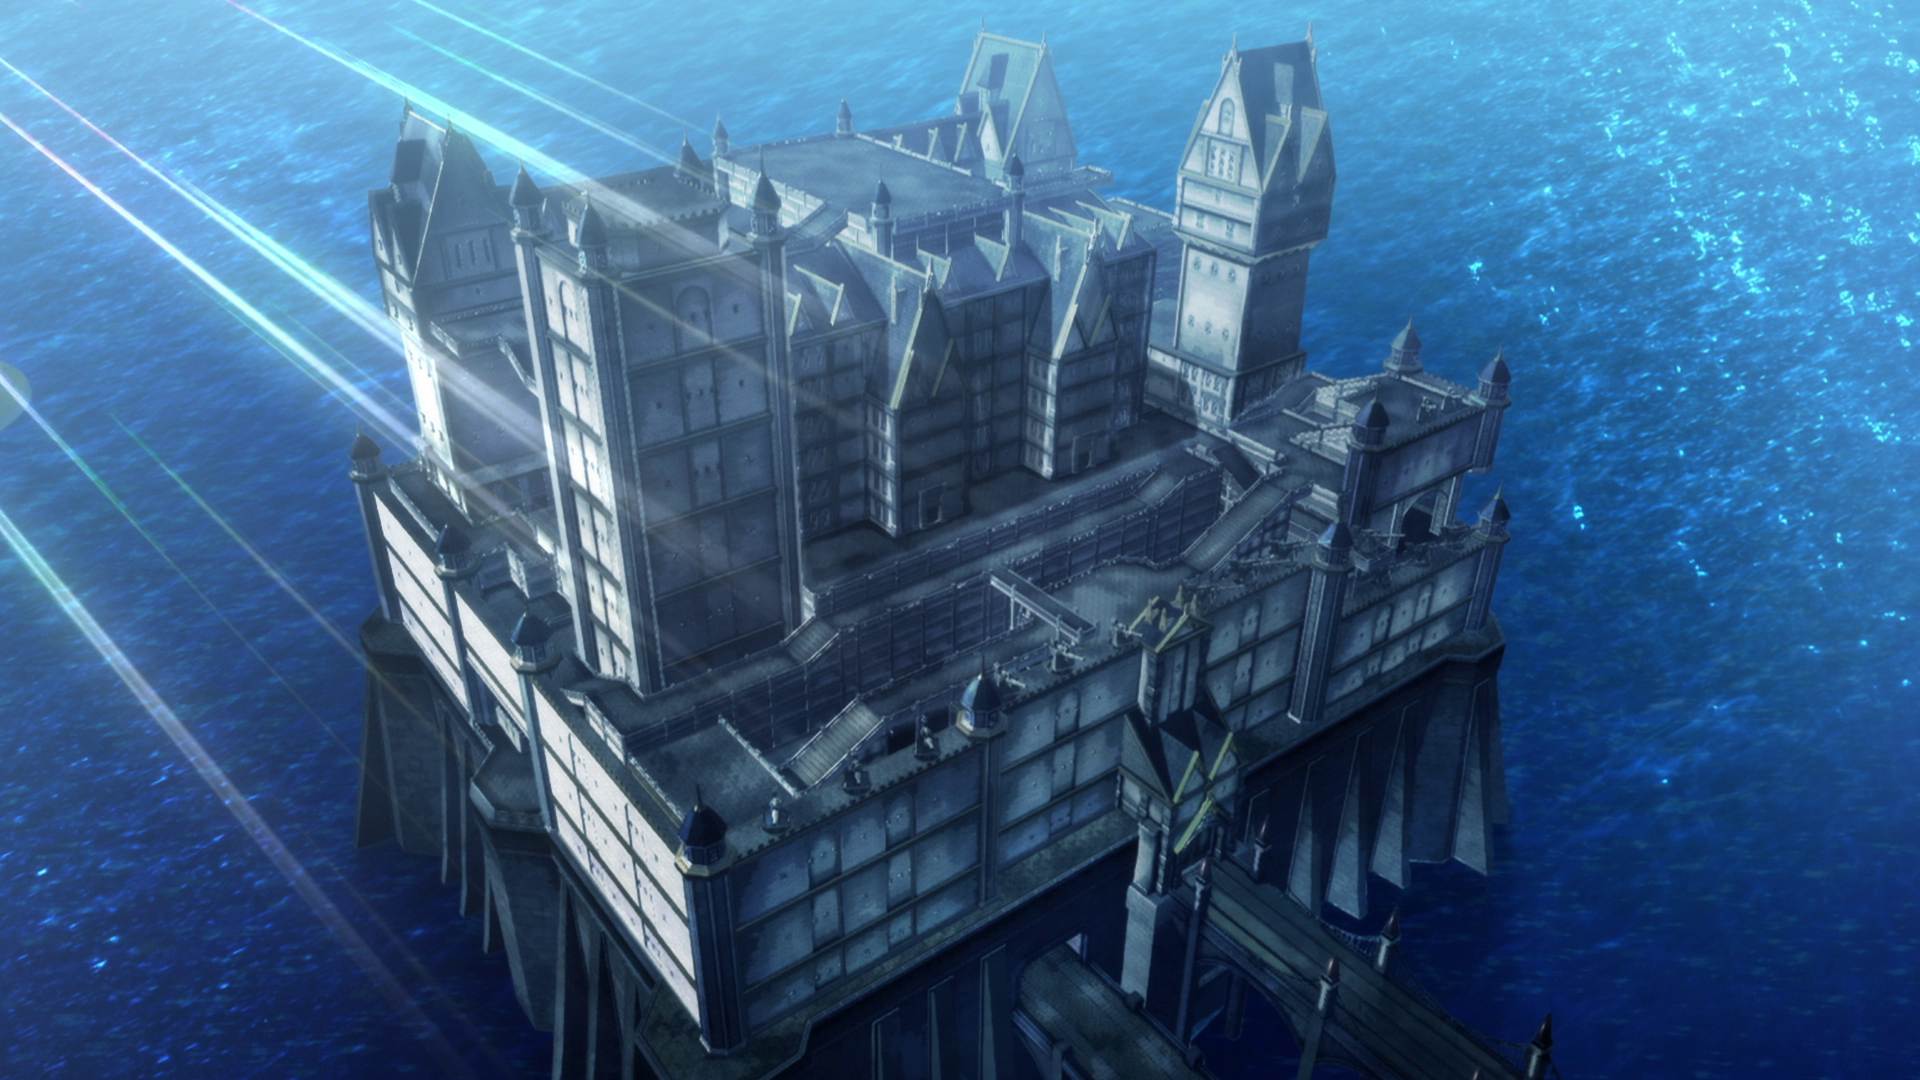
Juno Naval Fortress (ジュノー海上要塞) is a military installation in the Lamare Province, Erebonia.
Background
Juno is an naval fortress originally built in the Dark Ages, but continuously renovated.
During the Middle Ages a navy called the Knights of the Sea (海の騎士団) was established in the naval fortress to deal with piracy in Ordis, which has been known as a prosperous city since antiquity.[1] The Order fought many large-scale naval battles against the pirates near the coast of Ordis.
During the Erebonian Civil War, Juno served as the headquarters of the Noble Alliance. After the Imperial Army of Erebonia and Rufus Albarea of the Noble Alliance concluded on a ceasefire, a group of soldiers by General Aurelia Le Guin, commander of the Lamare Provincial Army, held the fortress under siege until August S.1205. Their force at the time consisted of 50,000 soldiers, enormous airships, enough supplies to extend their siege for 3 years and fully equipped anti-aircraft artillery. Even the Imperial Army was perplexed on how to deal with the situation.[2]
The Imperial Government extended a deal to General Aurelia: to lead the invasion into North Ambria in exchange for a pardon. She accepted the deal, and after the Northern War, Juno became the headquarters of the Unified Regions Army (統合地方軍), the fusion of the former Provincial Armies, under command of Brigadier General Wallace Bardias.
영웅전설 섬의 궤적 III
Background
During Thors Branch Campus' third field exercise, Class VII heads to Juno to coordinate with Brigadier General Bardias. They're ordered to investigate potential jaeger activity in the area while the Unified Regions Army is occupied handling security for the upcoming Imperial Provincial Council in Ordis.
On the day of the Council, Ordis is attacked by the Railway Cannons meant for Juno that were stolen by the forces of Ouroboros, the Red Constellation and the Northern Jaegers. Marquis Wilhelm Ballad orders Bardias to recover the cannons, leaving Ordis and the fortress undefended.
After leaving the retake of the cannons in the Languedoc Canyon to the rest of the branch campus and Bardias' forces, Class VII heads to Juno only to find that Ouroboros and the Northern Jaegers have already taken it. Zephyr and Azure Siegfried stand at the gate waiting for their moment to strike, but they decide to let Class VII retake the fortress once Aurelia Le Guin arrives to lead them.
At the top of the fortress, they find the Aion Type-αII and Arianrhod and the Stahlritter. Aurelia and Class VII are able to defeat them, and after Valimar and the Panzer Soldats disable the Aion, Arianrhod summons Argreion and destroys it singlehandedly before leaving.
Maps
| 1F |
|---|

|
| 2F |
|---|

|
| 2F Exterior |
|---|

|
| Junction |
|---|

|
| 3F Lower |
|---|

|
| 3F Middle |
|---|

|
| 3F Exterior |
|---|

|
| 3F Upper |
|---|

|
| Roof |
|---|

|
Enemies
| Enemy | 1F | 2F | 3F |
|---|---|---|---|
| Brigadier General Bardias - 1 | Quest | ||
| Brigadier General Bardias - 2 | Quest | ||
| Sneak Gunner G | ✓ | ✓ | ✓ |
| Sneak Gunner R | ✓ | ✓ | ✓ |
| Sneak Gunner M | ✓ | ✓ | ✓ |
| Phalanx J9 | ✓ | ✓ | ✓ |
| Saber Cougar | ✓ | ✓ | ✓ |
| Northern Jaeger - Rifle | ✓ | ✓ | ✓ |
| Northern Jaeger - Greatsword | ✓ | ✓ | ✓ |
| Zephyranthes | A | ✓ | |
| Balancing Clown | A | ✓ | |
| Sleipnir F2 | Story (B) | ||
| Gespard Gerrod | B | ✓ | |
| Duvalie the Swift | Story (A) | ||
| Ines the Stout | Story (Both) | ||
| Ennea the Sharp | Story (Both) | ||
| Arianrhod the Steel Maiden | Story (A) |
Treasure Chests
| Map | Key | Contents |
|---|---|---|
| Main 1 | 1A |  Galion Fort R Galion Fort R
|
| 2A |  EP Charge IV EP Charge IV
| |
| 3A |  Solemn Buckle Solemn Buckle
| |
| 4A |  Silver Hair - Jusis / Battle Scope, Smoke Grenade Silver Hair - Jusis / Battle Scope, Smoke Grenade
| |
| Sub 1 | 1B |  U-Material ×5 U-Material ×5
|
| 2B | Tear All Balm
| |
| Main 2 | 5A |  Zeruel Cannon R Zeruel Cannon R
|
| 6A | Curia Balm ×5, S-Tablet ×5
| |
| 7A |  Recuria SR Recuria SR
| |
| Sub 2 | 3B |        All Sepith ×100 All Sepith ×100
|
| 4B | Brave Seed
| |
| 5B | Power Potion II, Shield Potion II, Mind Potion II
| |
| Junction | 8A | Celestial Balm EX
|
| 9A |  Gravion Hammer R Gravion Hammer R
| |
| Main 3 | 10A | U-Material ×5
|
| 11A | Spirit Incense
| |
| 12A | Zeram Powder
| |
| 13A | All Sepith ×100
| |
| 14A |  Seraphic Ring R Seraphic Ring R
| |
| Sub 3 | 6B |  Seiryuu Seiryuu
|
| 7B | Zeram Powder
|
Quests
- Raising the Bardias: Wallace Bardias wants Class VII to help train recruits.
- Mystery of the Old Map: The second location is next to the bridge leading to the fortress.
- Field Exercises - Ordis: Juno Naval Fortress is taken by Ouroboros and the Northern Jaegers after the distraction at Languedoc Canyon.
영웅전설 섬의 궤적 IV
Background
After the Weissland Army's defection, the 3rd Armored Division under Zechs Vander was stationed in the fortress to train the new divisions of drafted soldiers.
Maps
| Juno Naval Fortress |
|---|

|
Quests
There are no quests in this location.
영웅전설 시작의 궤적
Background
The battalion stationed at the fortress was reassigned elsewhere in the post-Great War reorganization of the Imperial Army, leaving the fortress out of use. Marquis Ballad was, for a time, left in charge of the fortress. However, he hated being there due to the lack of personnel. After his private airship was disabled in flight he was saved only by Tita Russell's intervention. He blamed the ship of which he had purchased (despite Beryl's warning to avoid extravagant purchases) for his being at the fortress in the first place. Afterward, he chose not to return, leaving the fortress completely unmanned.
This disuse ended up saving countless lives on March 22 S.1207, when the fortress was levelled by Retributive Tower as a result of neither Erebonia nor Calvard responding to the Supreme Leader's proclamation that they join its Crossbell Unified Nation by noon. A massive whirlpool was all that was left of the fortress.
Gallery
-
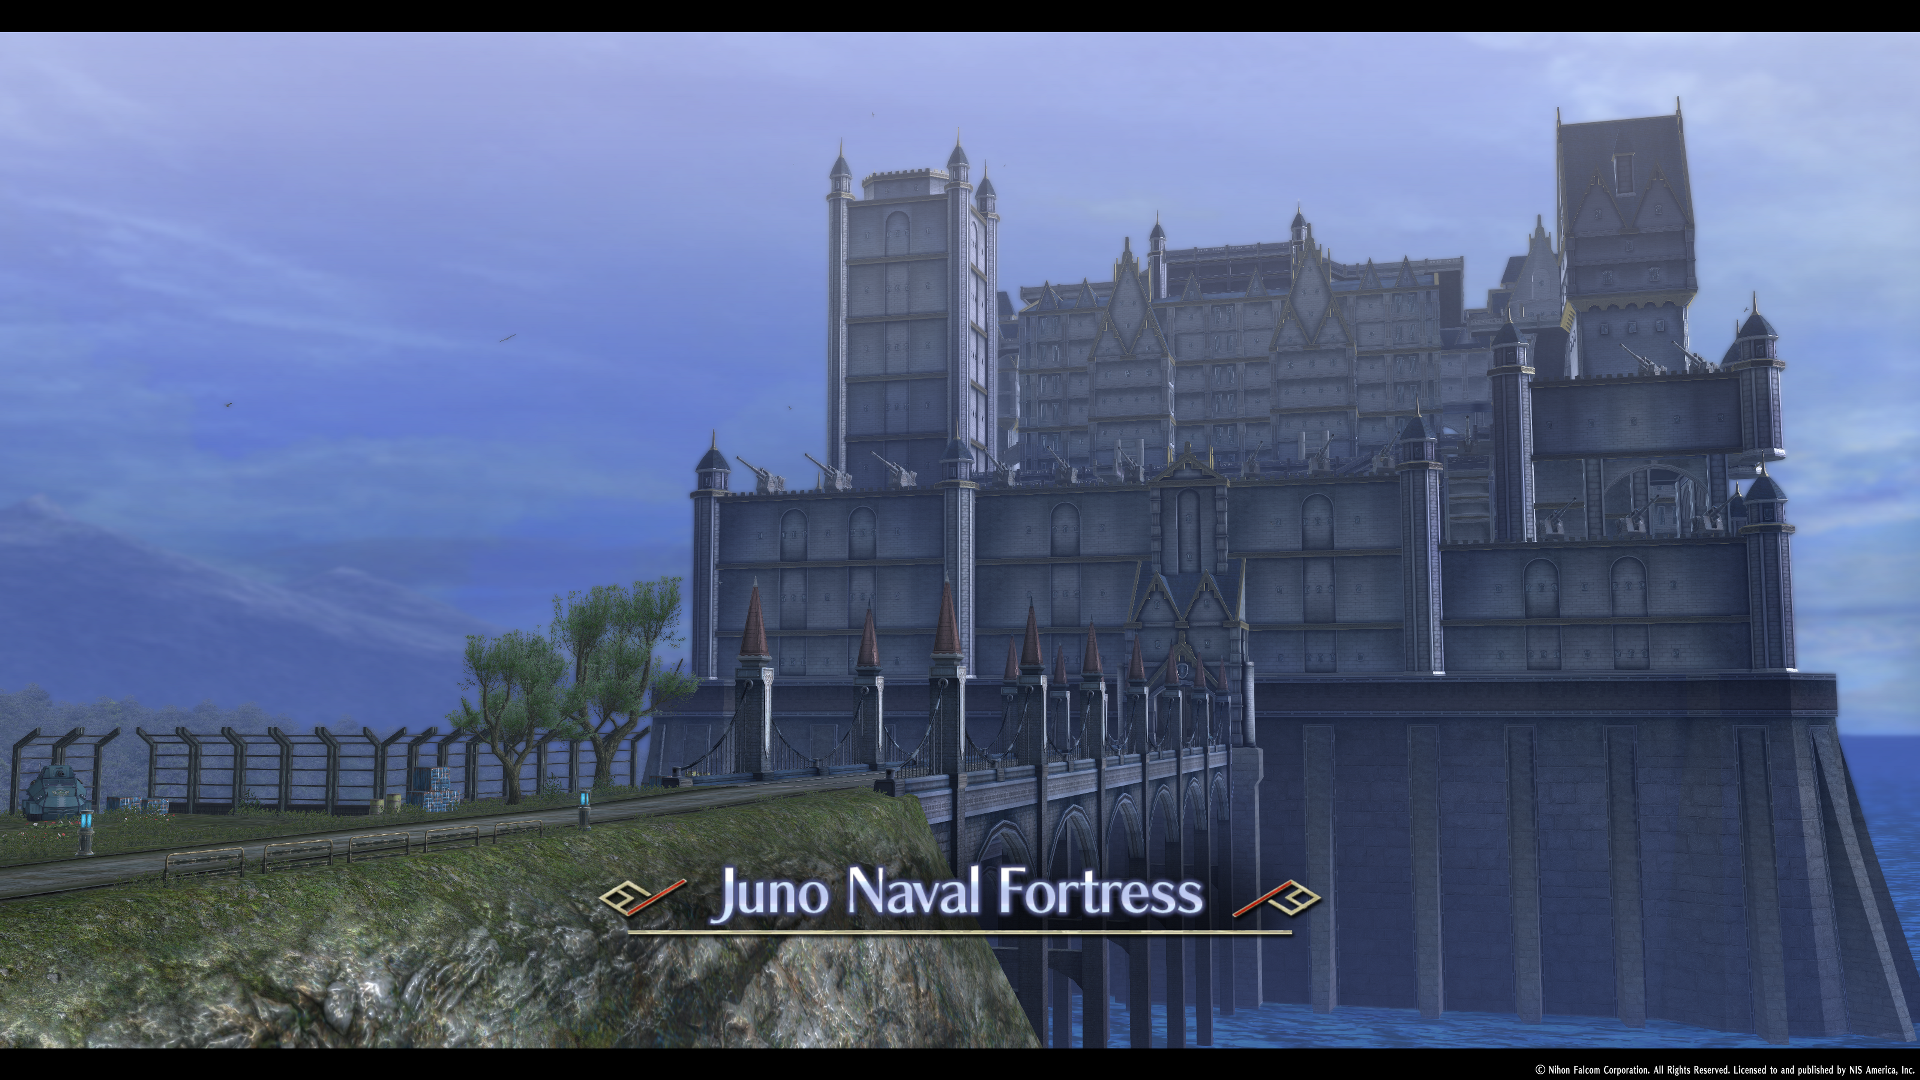 Introduction
 -
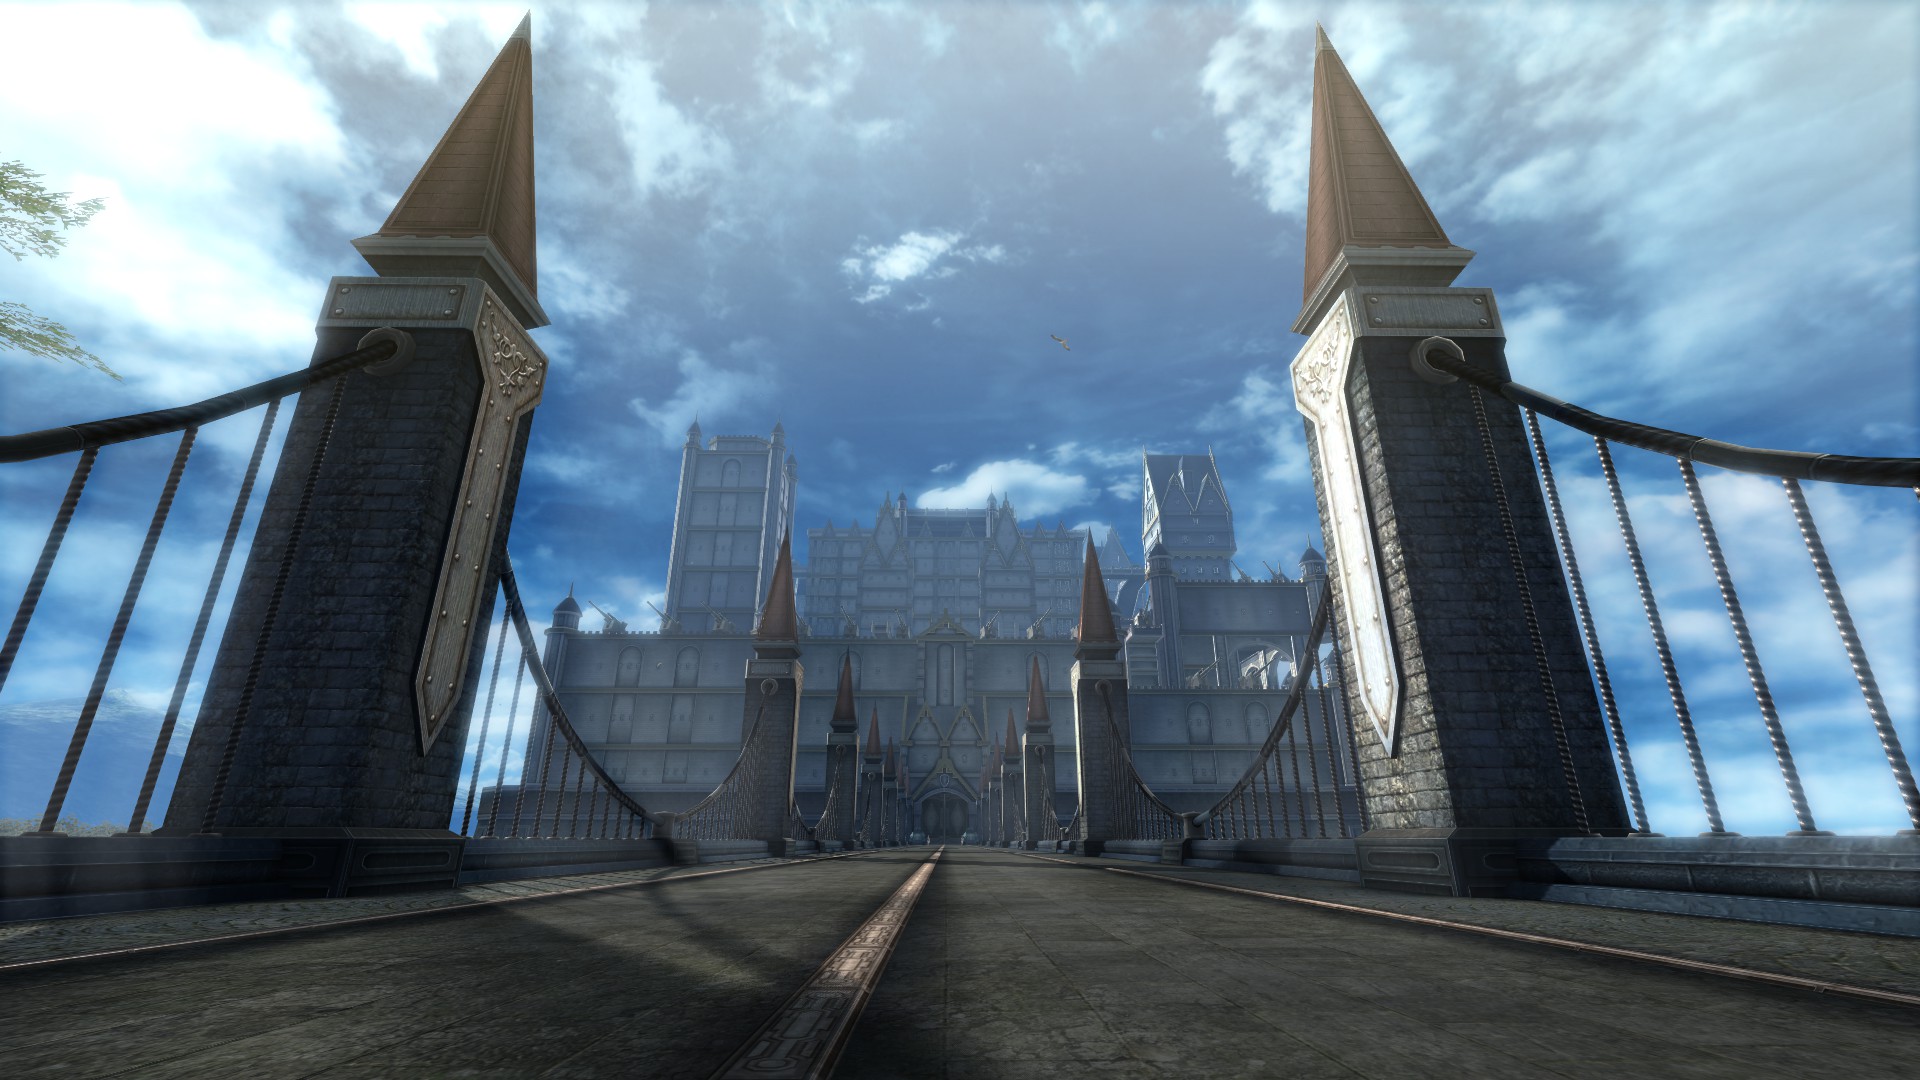 Juno Naval Fortress
 -
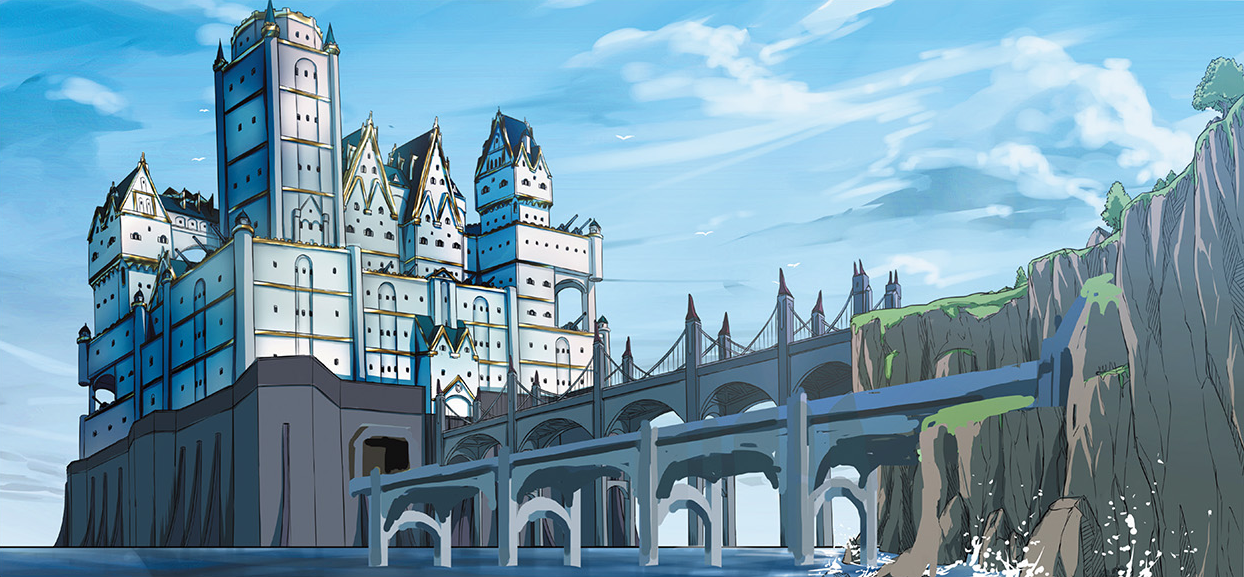 Location artwork
 -
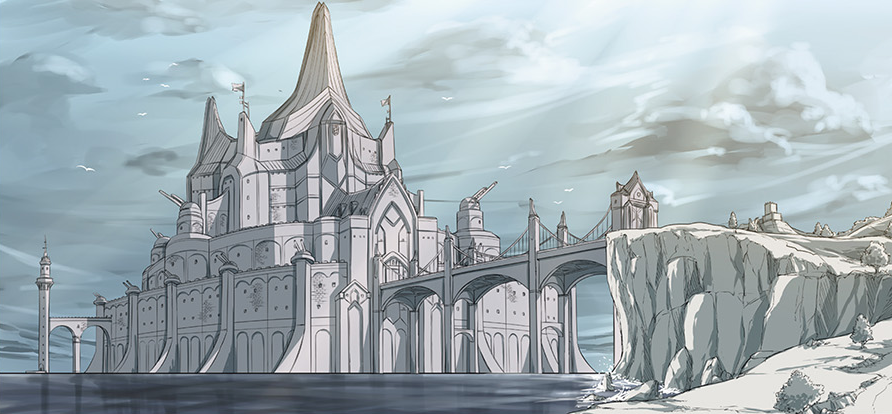 Concept art
 -
 Concept art
 -
 Concept art
 -
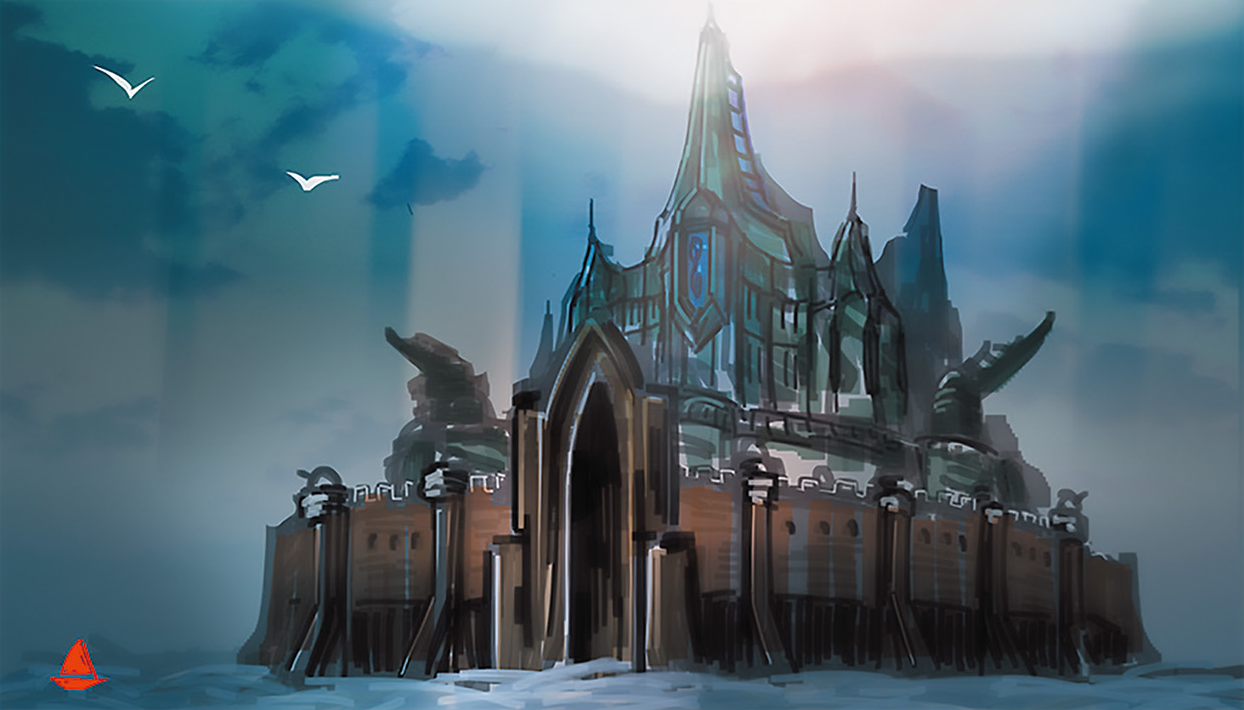 Concept art
 -
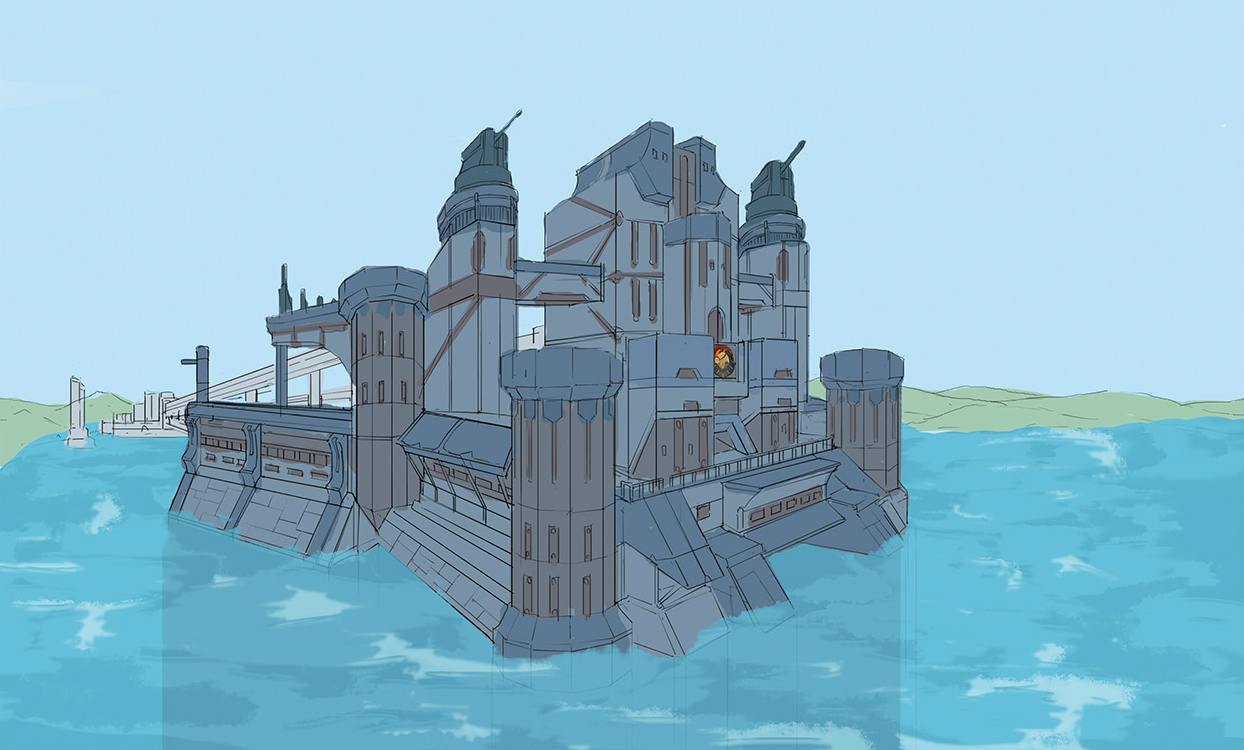 Concept art
 -
.png)
.jpg)
.png)
.png)
.png)
.png)
.png)
.png)
.png)
References
- ↑ 영웅전설 섬의 궤적 III, 제3장 "강철의 고동 ~해항도시의 혼란~", 06/18.
- ↑ 영웅전설 섬의 궤적 III, 제3장 "강철의 고동 ~해항도시의 혼란~".
Map of Western Erebonia
 | |
|---|---|
| <imagemap>
Image:Western_Erebonia_(Map).png|upright 4.5|frameless|center desc none rect 1100 658 1160 698 Leeves rect 1210 605 1360 658 Karel Imperial Villa rect 1045 590 1210 658 Thors Branch Campus rect 1223 658 1323 720 Heimdallr rect 1160 658 1223 688 West Ostia Highway rect 1271 720 1371 750 Himmel Cemetery rect 1205 720 1271 790 South Ostia Highway rect 940 615 1000 655 Grenville rect 1000 620 1045 650 West Side Leeves circle 844 535 15 Luna Shrine circle 880 570 70 Lake Gala rect 750 542 820 587 Milsante rect 460 520 520 560 Raquel rect 520 520 750 555 Milsante Byroad rect 590 555 730 795 Avon Hills rect 175 380 330 425 Juno Naval Fortress rect 155 460 215 520 Ordis poly 215 463 290 450 290 425 315 425 315 450 355 463 355 493 215 493 West Lamare Highway poly 355 463 460 520 460 560 355 493 West Languedoc Canyon Road rect 430 535 520 665 Rock Patio circle 190 630 15 Sanctus Shrine rect 150 520 215 620 Auros Coastal Road rect 10 290 120 345 Bryonia Island poly 484 520 530 340 570 340 514 520 North Languedoc Canyon Road rect 520 420 715 500 Languedoc Canyon rect 935 290 995 340 Alster rect 555 270 935 340 Old Lamare Road circle 1110 180 155 Osgiliath Basin rect 585 60 720 100 Aragon circle 1038 438 20 Black Workshop circle 700 990 20 Eryn circle 700 990 50 Eerie Woods rect 835 1050 940 1100 Saint-Arkh poly 564 810 414 866 408 995 603 1093 784 1067 862 963 852 846 756 800 Isthmia Great Forest rect 780 1050 835 1100 West Sutherland Highway rect 905 910 1040 960 Dreknor Fortress poly 900 1050 965 960 995 960 930 1050 North Sutherland Highway rect 1020 1300 1070 1350 Parm poly 870 1100 910 1240 1020 1330 1020 1300 940 1220 900 1100 South Sutherland Highway rect 1070 1300 1250 1330 Old Agria Road circle 1120 1280 15 Draco Shrine rect 1030 1350 1060 1530 Parm Byroad rect 995 1530 1080 1580 Titus Gate rect 995 1600 1080 1650 Haken Gate rect 910 1650 1160 1700 Liberl circle 998 1395 15 Hamel rect 975 1350 1030 1390 Hamel Road </imagemap> | |